Thursday, November 29, 2007
Money Card!
Thursday, November 22, 2007
Jingling Reindeer Cards...
(Papers from Dovecraft and Crafts By Carolyn, reindeer by Crafts for Christmas)
Step 2
Trim patterned paper to fit your card blank, edge with black chalk ink and adhere to card.
Trim white cardstock to fit your reindeer, edge with black chalk ink and mat onto black gingham paper. Trim this and edge again using the black chalk ink.
Attach your reindeer to the card mat using strong glue (I used my trusty sticks everything glossy accents)
Use foam pads to raise your reindeer from the card to give added dimension.
Tie a co-ordinating ribbon around your card and thread two silver bells on before securing the knot
I hope you and your family enjoy making and receiving this little jingling reindeer - We always like to see what you have been making so please leave a link in the comments box
Love Andrea xx
Thursday, November 15, 2007
Another Acetate Card!
Thursday, November 08, 2007
Funky Christmas Cards
Once I'd paid for, downloaded and unzipped the files all I had to do was print, cut out and glue down to make my cards.
I used my charcoal chalk ink to ink around the edges and to give some added detail and stop them looking too plain I used my pen to quickly doodle a line all around the edge of the card blank. It's not really straight but that just adds to it's charm!
I challenge you to use a digital kit to make some cards this week!
Love from Andrea xx
Thursday, October 25, 2007
Need Inspiration?
I've had a new set of mini Cuttlebug embossing folders sitting on my desk for three weeks whilst I work out what to do with them and as soon as I saw this sketch I new exactly how to use them! I used some shiny silver mirror card that I've had for a few years and never use and the embossing folders worked a treat.
CPS:
I changed the sketch slightly by increasing the size of my card but basically kept everything else in.
The challenge was another sketch, really simple and multi-use, it could be used for every possible occasion that you can think of.

I had loads of fun punching circles and then inking and gluing and managed to squeeze four different patterned papers from Craftwork Cards and chipboard letters from Scenic Route onto my card.
So, I challenge you to pick a challenge blog and join in with the fun and of course link us to your creations so we can see what you've all been up to :)
Happy Crafting love Andrea xx
Wednesday, October 17, 2007
Acetate Cards!
Thursday, October 11, 2007
In the pink
I used digital papers printed on my home printer from The Shabby Princess Compassion kit and Bella Collection and Pink Petticoat Doodlicious rainbow kit. I drew one of the wings onto a piece of card, cut it out and used it as a template for the other side, drew a freehand heart on the back of the spotty paper and cut it out and the 'Love You' sentiment was stamped using Making Memories magnetic alphabet stamps and black staz-on.
I sent my 'Love You' card to my Mam when I came back off my recent weekend retreat xx
Andrea x
Sunday, October 07, 2007
Christmas cards
Andrea created these yummy Star and Christmas tree cars using Blonde Moments Festive Feast 6x6 paper pad, gold ric rac, black chalk ink, Kayleigh font.
Caz created these wonderful Christmas tree cards with very festive colours.
And finally, something for the little ones. Maria passed the job over to her seven year old daughter. Amelia picked through the *scraps box* and decided on Basic Grey. She originally wanted to send all of her friends a card with a stamped image. Like her Mum she soon decided that this was too much like hard work and swapped to an easier style.
We really hope that you enjoyed seeing the cards made by our big girls and small girl. We would love to see any cards that you make so please don't forget to let us have a linkie dink.
Thank you so much to everyone who has entered our *Scrap your bosoms* challenge and or donated to our Just giving page. There are some super prizes to be wond this month but we can't forget the real reason we are doing this. Be safe ladies xxx
Thursday, October 04, 2007
Birthday Girl Card!
Begin by stamping your image and colouring her in.
Step Two
Cut a piece of patterned paper slightly smaller than the front of the card, ink around the edges and stick to the card. Add the stamped image to the left hand side.
Step Three
Cut a free hand heart out of the pink paper and ink around the edges. Type the word "Birthday" onto a piece of white card and ink that too.
Step Four
Arrange on card as shown, attach letter stickers, chipboard heart and bling for a bit of sparkle!
Hope you enjoy making this card! Have a great day and I'll see you soon! Joanne xx
Saturday, September 29, 2007
An Extra Special Prize Draw
Pretty in Pink Bella ATC - Joy
I coloured Bella with pink coloured pencils, trimmed the image, and glued it to pink blonde moments papers. I inked the ATC with black stazon ink. I then repeatedly dipped the ATC in UTEE, adding pink embossing powder and beadazzles.
Happy Birthday, For the Bride and Hi cards by Caz
Thursday, September 27, 2007
Baby Card
Ink around the edges of your stamped image with charcoal chalk ink and layer onto a slightly larger blue circle using foam pads to give dimension and chalk around the edges again.
Punch a scalloped circle from white card using a large punch, doodle and ink the edges
Step 6:
Glue the white circle onto a slightly larger blue circle and ink around the edges.
Mat the stamped image onto the scalloped circle using foam pads.
Step 1:
Cut letters from blue cardstock using a die cutting machine, electronic cutting machine or with scissors.
Doodle around the edges with a fine black pen
Use a cuttlebug embossing folder to emboss the letters
Assembling the card:
Step 1:
Cover a square card blank with patterned paper and ink around the edges with charcoal chalk ink.
Glue a strip of white ric rac across your card.
Use foam pads to attach your topper over the strip of ric rac.
Glue the 'baby' letters under the topper.
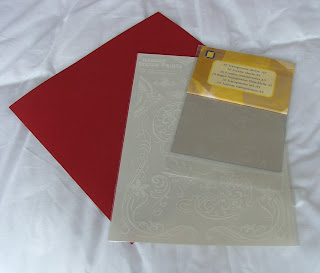
I specifically chose patterned paper that looked like it had lots of strips of ribbon running across it and added the ric rac to give extra detail to the card.
(Patterned paper by Flair Designs, ric rac from Fenwicks, punches by Dovecraft and EK Success, rubber stamp by Studio G, font for 'baby' letters stovetop, Cuttlebug embossing folder)
You could easily make this into a girl card by substituting the blue paper for pink paper and if you aren't sure of the sex of the new baby try something that isn't the typical blue or pink.
Have fun and don't forget to check back on Saturday for details of our fabulous prize draw. Andrea xx


