A very good day to you all :)
Today we are going to make a gift.
It's quick, inexpensive and pretty!!
PERFECT!!
Firstly you need to choose a few different bits of fabric (off cuts work well!).
Then you need to decide what shape you are going to use. I have chosen birds! Which I down loaded from a cool site called Kiddley!

I cut 2 birds from 3 different co-ordinating fabrics (ie 12 sides, 6 birds) using my pinking shears.
Next I pinned them together with wadding in the middle for stuffing. Oh and added a bit of lavender in each bird too :) This is particularly good if giving this to someone who likes nice smelly things! (like me!!)
 I used button thread, which is nice and strong, to stitch them up, making sure I added the ribbon as I went.
The top piece of ribbon is looped.
For the eyes I used gold beads which I chose to stitch on afterwards and pulled them tight to give the bird a little bit of shape.
In all it took about 3 hours to make, including the time on the internet looking for the bird shape.
Of course this is a great project to do with the kids!
You can cut the shapes out of foam or felt and decorate before stringing them together with twill, ribbon or wool!!
haPPy creATing
Caz
xx
I used button thread, which is nice and strong, to stitch them up, making sure I added the ribbon as I went.
The top piece of ribbon is looped.
For the eyes I used gold beads which I chose to stitch on afterwards and pulled them tight to give the bird a little bit of shape.
In all it took about 3 hours to make, including the time on the internet looking for the bird shape.
Of course this is a great project to do with the kids!
You can cut the shapes out of foam or felt and decorate before stringing them together with twill, ribbon or wool!!
haPPy creATing
Caz
xx


 These little bags made from calico with a little lace and tied with ribbon. I thought they might be nice for my great neighbours to hold some special soap or smellies.
  This is my favourite. A smallish draw string bag with a little Xmas rag wreath just pinned on.


 The candy canes are for hanging in my kitchen, which is having a Christmas foodie theme. They are very easy and quick to make, all you need is two pipe cleaners, I used red and white, twist them together and bend the top round to form the hook.

 Caz has made these gorgeous lavender filled tartan hearts for her tree; she used pinking shears to help stop the edges from fraying. These will smell and look gorgeous on her beautifully decorated and lit tree.


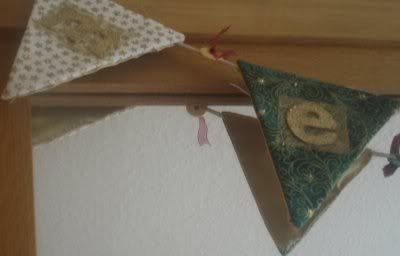
 I made it from 3 different fabrics, 2 Christmas decorative fabrics and gold satin to finish off the back. I cut the fabrics into triangles, using a template I had cut out of paper. I also cut out some Pelmet Vilene triangles to use as a support for the bunting. I sewed 14 triangles, 7 in white and 7 in green to the Pelmet Vilene and then I covered a large piece of cream felt with Versamark ink, and sprinkled gold embossing powder on it.
I then heated this with a heat gun and let the embossing powder melt. I repeated this process twice.
This left a beautiful gold felt :)
I made it from 3 different fabrics, 2 Christmas decorative fabrics and gold satin to finish off the back. I cut the fabrics into triangles, using a template I had cut out of paper. I also cut out some Pelmet Vilene triangles to use as a support for the bunting. I sewed 14 triangles, 7 in white and 7 in green to the Pelmet Vilene and then I covered a large piece of cream felt with Versamark ink, and sprinkled gold embossing powder on it.
I then heated this with a heat gun and let the embossing powder melt. I repeated this process twice.
This left a beautiful gold felt :)  I then drew around some Heidi Swapp Ghost Letters onto the embossed felt to read "Merry Christmas" and cut these out. I then cut some gold fibre paper out in squares the same size as the letters and sewed the letters to the bunting.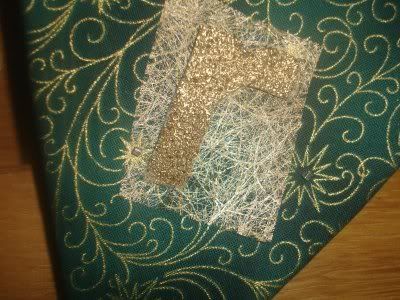

 As I had some fabric left I decided to make a hot pad for getting the dinner out of the oven, I just cut 2 squares approx 9x9 inches of the patterned fabric, the same from slightly thicker plain cotton fabric, and the same again from wadding (doubled up), pinned it all together then used my sewing machine to stitch diagonally across to form a criss cross pattern, then edged it with bias binding, very quick and simple to do.

 I still had a few scraps of the fabric left over, but not really enough to sew anything, so after hunting round the internet I came up with a great idea, A rag wreath, I made the circle with jewellery wire, it took quite a lot of wire to make it relatively sturdy, but you could always use an embroidery ring instead, I tore the fabric into strips approx 1 inch wide and 3 inches long, and tied it on the wire until it was full, I then tore a plain red fabric into slightly smaller strips, about half and inch wide and 2 and a half inches long and tied them in between, this wreath will hang inside my kitchen door.

 Di has done a lovely pinny/sack/shopping bag using fat quarters and calico.
 I bought about 5 "Fat quarters " in a little shop in Hitchin. Cut then into 6 inch srips and stiched them together. (about 5 feet of strips) Then backed them with calico so that the whole thing would be lined, turned the whole lot inside out and the top stiched. Almost too late added the smiley face buttons using embroidery cotton . i should have added them before attaching the lining so that the stiching would be concealed. I then made the ties, turned them inside out and attached them to the side of the SACK. VOILA I had a Christmas sack, a pinny with a BIG pocket, and a xmas shopper!!!! It is robust washable and I think quite Joyful.


 Now, I just need to help them with their sewing and they can sew those Brownie badges on for themselves.
 I know it looks like a pic of my bum, but really it isn't lol
 I sewed the new back seam and used