And a big hello from a few of us today!
Wonder if you too get tired of normal Xmas wrapping paper and ribbons.
Today we have a few ideas to make your gift a little more special by doing something different.
Caz has used Felt:
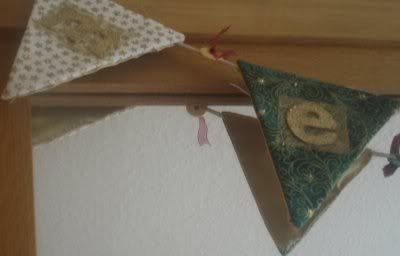
I was inspired by the cute little felt bag Andrea made back in June :) and the Christmas bunting I made in October.
The bag is made up of two sheets of red felt sewn together by hand with embroidery thread.
I had great fun making these and I can't wait to fill them with gifts :)

and a close up.....

Di has used fabric:
All of my gift bags are made from calico and left over fabric. They are easy peasy and quick to make!!! They are RAG bags and were inspired by Trish's lovely rag wreath and Caz's Christmas bunting.
This bag is made to look like a parcel and has draw strings.
 Again I have frayed ends and something that hopefully looks like a Xmas tree on the front.
 These little bags made from calico with a little lace and tied with ribbon. I thought they might be nice for my great neighbours to hold some special soap or smellies.
 This is my favourite. A smallish draw string bag with a little Xmas rag wreath just pinned on.
 Finally one last bag with a xmas stocking theme:
  Trish has also used fabric and felt.
Trish's drawstring bag is just GORGEOUS. The shapes are so simple yet effective. Trish used heavy cotton, felt and bondaweb to attach the felt to the cotton. She used white acrylic paint to 'frost' the tree and gold to highlight the bird .
Trish has also used fabric and felt.
Trish's drawstring bag is just GORGEOUS. The shapes are so simple yet effective. Trish used heavy cotton, felt and bondaweb to attach the felt to the cotton. She used white acrylic paint to 'frost' the tree and gold to highlight the bird . 
 And just a few more ideas. How about using:
Normal brown paper and stamping it using potato stamps with red paint and glitter glue?String , garden twine and sisal instead of ribbon?
And just a few more ideas. How about using:
Normal brown paper and stamping it using potato stamps with red paint and glitter glue?String , garden twine and sisal instead of ribbon? OK now all you have to do is finish that Christmas shopping and get Cracking with the Wrapping!!!
Love from us at IACW xx


 The candy canes are for hanging in my kitchen, which is having a Christmas foodie theme. They are very easy and quick to make, all you need is two pipe cleaners, I used red and white, twist them together and bend the top round to form the hook.

 Caz has made these gorgeous lavender filled tartan hearts for her tree; she used pinking shears to help stop the edges from fraying. These will smell and look gorgeous on her beautifully decorated and lit tree.


 I made it from 3 different fabrics, 2 Christmas decorative fabrics and gold satin to finish off the back. I cut the fabrics into triangles, using a template I had cut out of paper. I also cut out some Pelmet Vilene triangles to use as a support for the bunting. I sewed 14 triangles, 7 in white and 7 in green to the Pelmet Vilene and then I covered a large piece of cream felt with Versamark ink, and sprinkled gold embossing powder on it.
I then heated this with a heat gun and let the embossing powder melt. I repeated this process twice.
This left a beautiful gold felt :)
I made it from 3 different fabrics, 2 Christmas decorative fabrics and gold satin to finish off the back. I cut the fabrics into triangles, using a template I had cut out of paper. I also cut out some Pelmet Vilene triangles to use as a support for the bunting. I sewed 14 triangles, 7 in white and 7 in green to the Pelmet Vilene and then I covered a large piece of cream felt with Versamark ink, and sprinkled gold embossing powder on it.
I then heated this with a heat gun and let the embossing powder melt. I repeated this process twice.
This left a beautiful gold felt :)  I then drew around some Heidi Swapp Ghost Letters onto the embossed felt to read "Merry Christmas" and cut these out. I then cut some gold fibre paper out in squares the same size as the letters and sewed the letters to the bunting.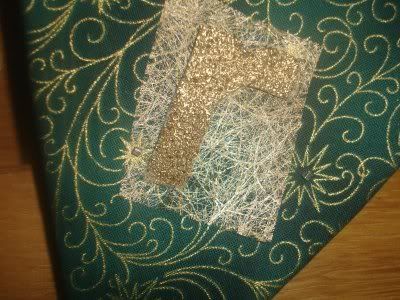


 Cut your cardstock to 15cm x 22 cm and fold in half for a landscape card. Cut two strips of the patterned paper 5 1/2cm x 15cm and cut a smaller strip to go across the middle. Ink the edge of the smaller, middle strip for a little definition. Arrange on your card like so:


 I hope you liked this card and have fun making it.