The winner of the Buttonberry kit was Sarah. We've left you a comment on your blog and if you email us we'll pass your address to the girls at Buttonberry.
If you are looking for an extra special gift that you can really put a lot of love into this Christmas - or anytime of year - we think we have found the perfect idea, read on to find details of this weekends super prize draw!!
Buttonberry are an online store owned by Emma and Lisa, selling fabric and patchwork goods and stock a vast array of patterns including the rather adorable Pocket and Floss bunnies by Australian designers Melly & Me.
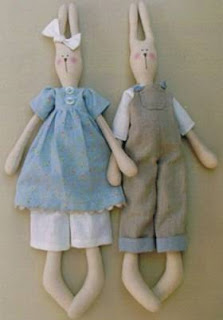
Andrea discovered Buttonberry earlier in the year and has bought several of their lovely patterns including the Pocket and Floss pattern. As she says "After making 17 of these lovely bunnies over the past couple of months I still haven't got bored of creating them and although each one is made from the same simple pattern, they all have their own little characteristics and personality. They make gorgeous hanging decorations in a room and are the perfect gift to celebrate the arrival of a new baby, a birthday or just to show your love for someone."
Andrea's latest bunnies were a gift to celebrate the arrival of baby Luca and a special Christmas gift for a little girl up in Scotland, with the addition of a little embroidered pinny to keep her frock clean during all the Christmas preparations!

 The Pocket and Floss pattern is very easy to follow with simple step by step instructions and Buttonberry carry a vast array of fabrics for making your own bunny, why not visit their online store and check out their latest fabric finds, we love their Christmas fabric ranges and we can't imagine anything nicer than giving a special Christmas gift created with love that will last forever.

 The girls at Buttonberry have very kindly donated a Pocket and Floss kit to make your very own bunny as a prize for all comments left on our blog during this weekend (we will draw the winner at 9:00pm on Sunday evening). Please leave some way of contacting you with your comment (blog link, email address or forum username etc.) so that we can track you down and send you your wonderful prize.
If you feel inspired to make your own Pocket and Floss bunnies please leave us a link when you finish them so we can all come and take a peep!
Have fun crafting this weekend and don't forget to leave us a comment to be entered into the prize draw.
Love from the IACW and Buttonberry girls
xxxxxxxxxx


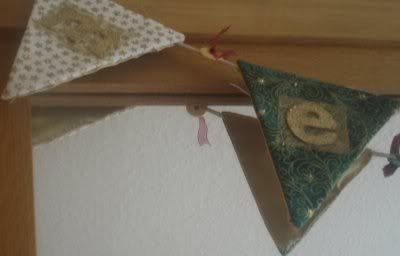
 I made it from 3 different fabrics, 2 Christmas decorative fabrics and gold satin to finish off the back. I cut the fabrics into triangles, using a template I had cut out of paper. I also cut out some Pelmet Vilene triangles to use as a support for the bunting. I sewed 14 triangles, 7 in white and 7 in green to the Pelmet Vilene and then I covered a large piece of cream felt with Versamark ink, and sprinkled gold embossing powder on it.
I then heated this with a heat gun and let the embossing powder melt. I repeated this process twice.
This left a beautiful gold felt :)
I made it from 3 different fabrics, 2 Christmas decorative fabrics and gold satin to finish off the back. I cut the fabrics into triangles, using a template I had cut out of paper. I also cut out some Pelmet Vilene triangles to use as a support for the bunting. I sewed 14 triangles, 7 in white and 7 in green to the Pelmet Vilene and then I covered a large piece of cream felt with Versamark ink, and sprinkled gold embossing powder on it.
I then heated this with a heat gun and let the embossing powder melt. I repeated this process twice.
This left a beautiful gold felt :)  I then drew around some Heidi Swapp Ghost Letters onto the embossed felt to read "Merry Christmas" and cut these out. I then cut some gold fibre paper out in squares the same size as the letters and sewed the letters to the bunting.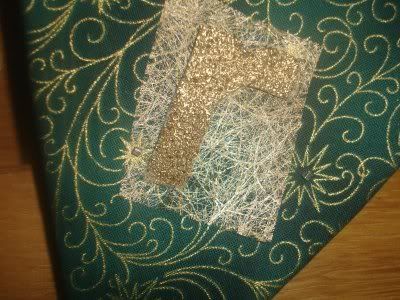

 As I had some fabric left I decided to make a hot pad for getting the dinner out of the oven, I just cut 2 squares approx 9x9 inches of the patterned fabric, the same from slightly thicker plain cotton fabric, and the same again from wadding (doubled up), pinned it all together then used my sewing machine to stitch diagonally across to form a criss cross pattern, then edged it with bias binding, very quick and simple to do.

 I still had a few scraps of the fabric left over, but not really enough to sew anything, so after hunting round the internet I came up with a great idea, A rag wreath, I made the circle with jewellery wire, it took quite a lot of wire to make it relatively sturdy, but you could always use an embroidery ring instead, I tore the fabric into strips approx 1 inch wide and 3 inches long, and tied it on the wire until it was full, I then tore a plain red fabric into slightly smaller strips, about half and inch wide and 2 and a half inches long and tied them in between, this wreath will hang inside my kitchen door.

 Di has done a lovely pinny/sack/shopping bag using fat quarters and calico.
 I bought about 5 "Fat quarters " in a little shop in Hitchin. Cut then into 6 inch srips and stiched them together. (about 5 feet of strips) Then backed them with calico so that the whole thing would be lined, turned the whole lot inside out and the top stiched. Almost too late added the smiley face buttons using embroidery cotton . i should have added them before attaching the lining so that the stiching would be concealed. I then made the ties, turned them inside out and attached them to the side of the SACK. VOILA I had a Christmas sack, a pinny with a BIG pocket, and a xmas shopper!!!! It is robust washable and I think quite Joyful.