Thursday, November 29, 2007

Money Card!

Hello everybody! Joanne here again. Like many teenagers, my 14 year old nephew has asked for money for Christmas to save up and buy the latest computer games. With this in mind I thought I would challenge myself to come up with a card, suitable for a teenage boy, incorporating money in some way. This is what I came up with:
Not very Christmassy, I grant you. But perfect for a skate mad teenage boy, I think!
The card itself is very simple to do. I took a 15cm x 15cm ready made black card blank and onto that attached a 14cm x 14cm piece of Basic Grey Skate Shoppe "Kickflip" patterned paper, having inked all the edges in charcoal chalk ink first.
The actual skull and cross bones were freehand drawn onto white card and cut out. I then crumpled them up and distressed them with Tim Holtz Distress Ink in Weathered Wood and again, inked the edges with charcoal chalk ink.
Co-ordinating embroidery floss was used to attach to metal buttons onto the skull and also to tie the £5 notes onto the bones.
The skull and cross bones were then attached to the card and it was done!
This design could obviously be used for a birthday card and I think is more fun than just sticking the money inside the card (plus with the money being actually attached to the card less chance of it getting lost!)
I hope you enjoy this card and I'll see you soon!
Joanne xxx

Wednesday, November 28, 2007

Faux mini canvas

We are so very excited to welcome the fabulously talented Lousette Ashton back to It's a creative world. I shall hand you over to Lousette and let her weave her magic.

A long time ago I bought several packs of small, very cheap IKEA photo frames, you know the ones that are 3 for £1 or something silly like that. I had grandiose ideas for them, but nothing ever came of it and they sat in a box under my bed for years (literally).

Then one day I saw a beautiful photo printed onto a canvas in a restaurant, and decided to have a go at making my own mini photo canvas using cotton printable fabric from Crafty Computer papers. These little faux canvasses are cute as gifts, and also great for photos that are maybe not good enough for normal printing as the texture of the cotton disguises grain or other flaws.

You will need: Small wooden picture frame Plain white cardstock Spray mount or Photo mount Printable cotton sheet Double sided tape Tacky, PVA or other wet glue Scissors and craft knife

Step 1
Remove the glass form the photo frame. If you have a very dark coloured frame you might want to give it a quick coat with white acrylic paint.

Step 2 Measure the outside dimensions of the frame. Crop a photo to these exact dimensions and print out onto cotton paper. I find it sometimes help to adhere the cotton to a sheet of ordinary printer paper using removable adhesive. Although the cotton has a backing sheet attached to it, it is still quite thin and my printer couldn’t feed the sheet properly on its own.

Step 3 Use double sided tape to cover the front of the frame with plain white cardstock. Trim the cardstock to size. (I always use a bigger piece of card and then trim afterwards using my craft knife instead of cutting the cardstock to size first).

Step 4 & 5 Spray the cardstock with photo mount, remove the backing sheet from the cotton and drape over the frame. The photo mount gives you the chance to reposition the image until it is perfectly placed. Press down gently to make sure the cotton adheres to the cardstock.

Step 6 Cover the sides of the frame with double sided tape and fold the cotton over. Make sure it is nice and taut. Fold each side over onto the back of the frame, mark with a pencil and trim off the excess cotton.

Step 7 & 8 Use double sided tape to finally glue the remaining cotton onto the back of the frame, making sure the corners are tucked neatly on the sides. Glue the excess fabric of the corners down onto the back with tacky glue. Hold for a few seconds until the fabric stays in place.

Decorate the front with embellishments or rub-ons if you wish, or simply leave as is.

Thank you so much Lousette and what a fantastic gift for the children to give relatives at Christmas.

If, like us, you've been inspired by Lousette please let us know. We love to see all your creations. And just a reminder: We will be off line on Friday the 30th November for our move over to typepad!! Please be sure to pop back on Saturday the 1st December for the link to our new home.

Tuesday, November 27, 2007

Christmas Crafts Blog Roundup

I love looking for inspiration on the web and have a growing list of blogs that I visit - some daily and others randomly. Whilst on my blog travels I have come across some really inspirational Christmas crafts and thought I would share them with you today. It is always nice to hear that other people appreciate what you're crafting so if you do visit these blogs why not leave a comment on the blogs and brighten someones day.
Christmas Wreath by Christine Middlecamp
Paper tree by Melissa Francis
Advent Calender by StoneyBrook
Button Tree by Tia Bennett If you feel inspired to get crafty for Christmas, leave us a comment with a link to your work so we can all come and take a peek!!

Love from Andrea xx

Today we also say a big haPPy birTHday to our very own Di!! from all the creAtive girls :) xx

Monday, November 26, 2007

Are these still in fashion? Who Cares!

Hi from Di on moving day. Yes today is the day my packers move in to pack up my home. Woo Hoo.
So what would you rather be cold or cosy??? Me, I prefer cosy, and believe some things that seem to go in and out of fashion can be worn fashionably and are ALWAYS cosy.
I made this poncho for Caz a few years back and decided this year to make another for me for my trip to England.

All you need is a big pile of double knitting wool. Yes bigger than this. And get yourself a 4.0 mm crochet hook.

For an adult we start with 96 chain then slip stich into the first chain to form a circle.
Then into the same slip stich make 3 DC (double crochet) 2 CH (chain) and 3 DC to form the first corner.
Then skip 2 chain and 3 DC into the next chain and repeat 6 times. Now make the SECOND corner skip 2 chain and 3DC 2 CH and 3 DC into the next chain. Then skip 2 chain and 3 DC into the next chain and repeat 6 times. Now make the THIRD corner skip 2 chain and 3DC 2 CH and 3 DC into the next chain. Then skip 2 chain and 3 DC into the next chain and repeat 6 times. Now make the FOURTH corner skip 2 chain and 3DC 2 CH and 3 DC into the next chain.Then skip 2 chain and 3 DC into the next chain and repeat 6 times. You should now be back t the FIRST corner!!! Slip stitch into the top of the 1st DC and across the next 2 DCs.
WOW you have completed the first round!!! Then just carry on going round and round keeping your corners in the right place and changing colours whenever you feel like it!!!
I do hope you can learn to crochet!!!! If you need any help I will be in England from the 11th of December 2007 and would so like to meet you and help you get started!!! And just a reminder:
We will be off line on Friday the 30th November for our move over to typepad!! Please be sure to pop back on Saturday the 1st December for the link to our new home.
Take care and love from Di XXX

Sunday, November 25, 2007

Christmas Candles

Hi Everyone! It’s Angela here! Continuing on our Christmas theme, today we have some Candles that we have decorated to show you. First are Andrea’s beautiful Candles: 
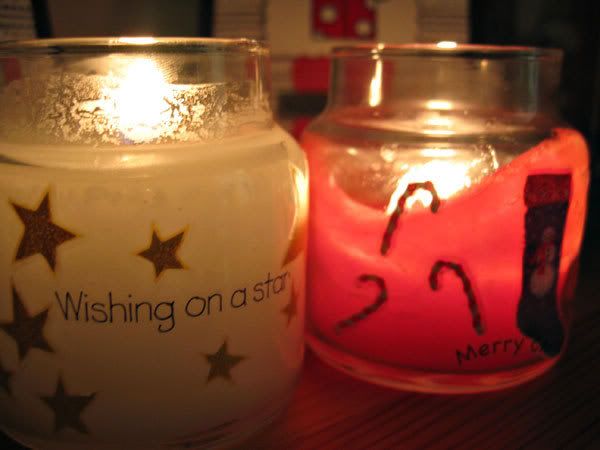
"Very, very simple for these, I just removed the label from my Yankee candle jars, cleaned off the glue and applied some festive rubons around the jar. As the candle burns down, it shines its light through the rubons." Here are the ones that I made: 
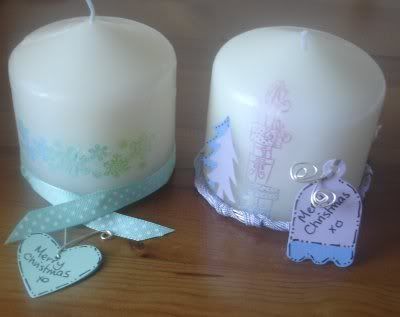
I embedded the stamped image into the candle – this was surprisingly easy to do. I stamped a Christmas themed image onto a piece of white tissue paper using Brilliance Inks, and heated this just to make it set, then trimmed around the image quite closely. Once I had done this I used a glue stick to adhere the tissue to the candle, just to hold it in place, and then heated the candle using a heat gun. As the candle is heated, the wax melts and covers over the image, incasing it in the wax. You need to be careful doing this as it can get very hot. Then while the candle was hot I rolled it on a non-stick craft sheet to try to smooth out any bumps in the candle caused by the wax dripping. It is awkward to do this and it never looks as smooth as it did when you started out! 
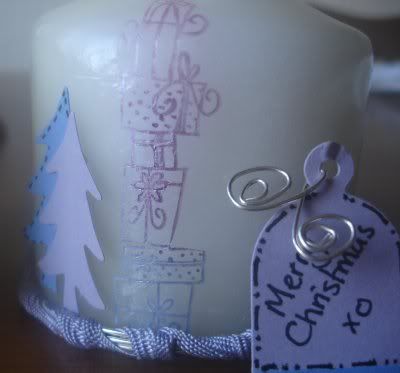
Once the candle had cooled, I wrapped wire around one of the candles, and then wrapped ribbon around this wire. I then punched out 2 tags in contrasting colours and doodled on it. On the other candles I punched out some Christmas trees and adhered them on (these will obviously need to be removed if you are lighting the candles!) and decorated another tag.
Jo has used a variety of candles on her Christmas table, including tea lights and small church candles with gold-sprayed mini wreaths at the base, and has created a very simple but effective table decoration using a glass bowl filled with satsumas, gold baubles, walnuts and Christmas holly sprigs.
Christmas table
I hope this inspires you to have a go at making your own table decorations for Christmas, to make your table look unique! ~angela~