Saturday, September 15, 2007

Fabulous photo frames

Hi, I’m Karen and I was thrilled to be asked to be a Guest Designer for today. Thank you ladies for inviting me. I’m going to show how to transform an ordinary, run of the mill photo frame into an object of beauty.

As you can see, my photo frame was looking dull and the photos were about 3 years out of date too, so the whole thing was desperately in need of a makeover. I’ve covered this one with cardstock weight patterned paper, which works well on flat surfaces, but if you have a moulded frame, you could paint instead (I’d recommend you use gesso as a primer first).
Supplies for the frame shown here:
Mod Podge Sandpaper K&Co Amy Butler Belle patterned papers Fancy Pants chipboard flowers Li’l Davis Designs chipboard photo corners Li’l Davis glitter chipboard alphabet Maya Road chipboard heart Heidi Swapp fuzzy rub ons, pink Li’l Davis glitter glaze, clear Lime green, bright pink & pale blue acrylic paint Pale blue ric rac
Firstly, choose your patterned papers – the ones I’ve used are K&Co Amy Butler Belle but the beauty is that you can use absolutely anything and match it to your home décor. Measure the width and height of the frame, and cut strips of patterned paper to size. Note: as my frame is quite wide, I had to join two strips together for the top and bottom strips but I matched the pattern carefully and it’s barely noticeable. Alternatively, you could use lots of paper scraps and cover your frame in a patchwork effect.
To mitre the corners , simply place the patterned paper strip in position on top of the frame and make a small mark to show where you need to cut at an angle. The photo below is to illustrate this; I’ve used a thick black line so it can be seen more clearly but in practice I just make a very small mark with a pencil by the inner corner of the frame.
Sand the frame lightly to key the surface, and use Mod Podge to stick the papers in place. Allow to dry and sand the edges of the paper to give a distressed/aged feel; apply a thin coat of Mod Podge to seal.
Once dry, decorate the frame as you like. I covered some chipboard flowers with patterned paper, then sanded the edges and tied on some ric rac. I then added some glittery chipboard lettering plus some painted and glittered chipboard embellishments. You can keep it simple or pile on the embellishments; a word of wisdom though (it’s probably obvious but I learned this the hard way when I did my first frame a while back) – if your photo frame is to be used freestanding, make sure that the embellishments don’t overhang the bottom edge or it won’t stand up!
As a finishing touch on my frame, I added some new up to date photographs and used rub on velvet lettering on each photo. I hope you like the project and it inspires you to give some of your old frames a makeover of their own.


Friday, September 14, 2007

Top Tips

Hi all today we are doing craft top tips, I have asked all the CW girls and this is the list we have come up with, If you have any others please leave them in the comments section. Trish xxx Trish - get yourself an A2 (at least) craft mat. Maria - I like to bag bits up so that I can do something at short notice. Kind of a ready made kit for when the girlies are in bed and I get a spare hour. - Bulk buy Herma, as I never know when it is at the end of the roll. - Turn off the computer or I get distracted and nothing gets done. - I gut patterned paper if I'm mounting something big Di - using project folders for work in progress Caz - after each LO/project pack everything away so you're tidy before starting the next one Andrea - When making cards and I want to cover the whole of my card blank I don't cut out the paper first, I use double sided tape all around the edges to stick my paper to the card and then turn it over and trim with a craft knife. This means that I never have wonky cards and edges that are less than perfect

Thursday, September 13, 2007

Teenage Boy Card

I'm a girl - I like making girly cards - flowers are my speciality :) I do tend to struggle when making male cards and especially teenage boy cards. I always seem to stay safe and use large letters to spell out their names or numbers in 'boy' colours to identify their age.
So today I challenged myself to come out of my safety zone - to make a card for a teenager using no ages and names.
I did intend to do step by step photographs but the best laid plans and all that - the camera battery went flat as soon as I took the first photograph.
I used patterned papers from The Shabby Princess and Pink Petticoat, Making Memories chipboard buttons (if you haven't tried these you should really get some as they are lovely), alphabet stamps, black chalk ink and staz-on ink and a black pen. Cut a square of striped paper, rectangle of spotted paper and the large circle was made by drawing around a jar lid and the bottom of a glass. Doodle and ink around all of the edges and glue onto a card blank. Cut a star from patterned paper, tie embroidery thread around the chipboard button and glue in place. Use the alphabet stamps to make letter tiles to spell out Happy Birthday and add a thin strip of black and white doodle striped paper.
Hey Presto - a card for a teenage boy that doesn't have
golf clubs, a 1970s footballer or a sailing boat on it!
Happy Cardmaking, love from Andrea xx

Wednesday, September 12, 2007

Decorated door hangers...

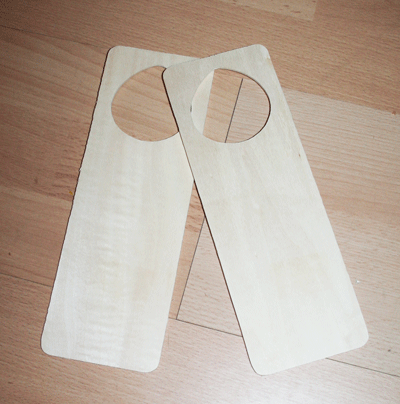
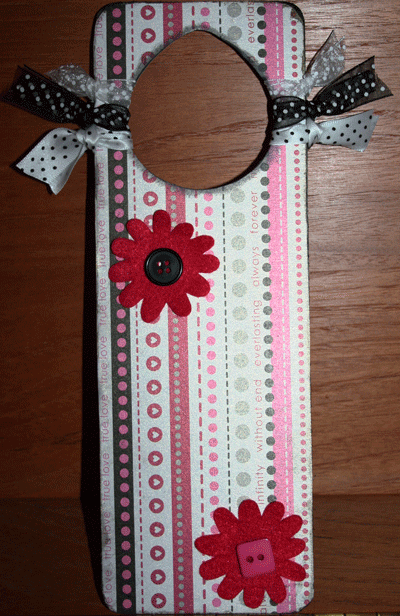
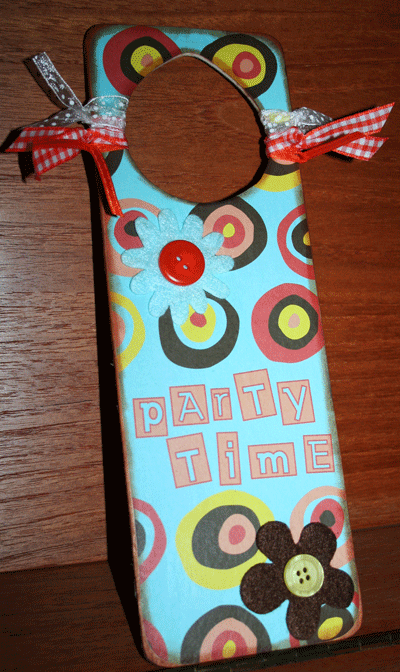
Hello :) It's Jo here again, with some decorated door hangers for you to try out! These make great gifts for children, and can be personalised or themed, whatever takes your fancy. I bought my 'blanks' from Hobbycraft, but I've also found them here, here, and here. This is how the wooden blanks look 'naked': door-hangers-1 In addition to the blanks, I used two sheets of patterned paper, one for each hanger - you don't need anything like as much as a whole sheet of 12x12, and this is an ideal project for using up scraps or offcuts from other projects. I also used ribbon, buttons, felt flowers and ink. Having made my paper selection, I traced around the outside of the blank with a pencil, onto the patterned side of the paper. I then carefully cut just inside the traced line, all the way around, so that the cut paper shape was just a little smaller than the blank. This just ensures that the edges are neat and that there isn't any overhang. It doesn't matter if a little bit of the wood is showing around the edges as these are going to be inked. I used a very slightly watered down PVA glue mix, and applied glue to both the blank and the patterned paper before very carefully sticking the paper to the blank. The glue isn't very forgiving, so it is important to line up the paper before finally sticking it down, and then smoothing it out to get rid of any air bubbles. Having stuck the paper onto the wooden blank, I let it dry for around five minutes, and then brushed over the top of the paper with the PVA solution to seal it. When this has completely dried, you are ready to ink around the edges of the hanger; this gives a nice finish, and will hide any joins between the paper and the wood. If the ink is a little wet, make sure it is completely dry before adding your embellishments. I've used ribbon, flowers and buttons, but in terms of what you put on your door hanger, the sky's the limit! Here's one of my completed hangers: door-hanger-2 For this one, I used Ki Memories paper, American Crafts felt flowers, and Blonde Moments ribbon and buttons. And here's the other one: door-hanger-3 And here I've used Cherry Arte paper, with flowers, ribbon and buttons as before. These are really quick to make, and as well as making great gifts, they are a fun project for kids to do on a rainy afternoon. Happy crafting! xxx

Tuesday, September 11, 2007

Let's get knitting

Hi again from Di. Well as I move into spring and summer guess most of you are moving to Autumn and Winter, so its time to start getting ready for those long winter nights.
And I have another easy peasy project for you this week. All you have to know about kntting is how to: cast on knit plain knit purl and cast off.
Today it's a really cosy blanket for you to curl under whilst watching TV or sleeping! I used only one colour of wool but you could use 9 or 16 different colours depending on how big you want the blanket to be. The blanket is made of knitted squares each measuring 14 inches by 14 inches.
OK what you will need is a pair of 4.5mm knitting needles and 1 and a quarter balls of wool (50 gm) per square. (I made 16 squares). The wool I used is South African made and it's thicker than double knitting so a sort of chunky wool. It is machine washable and 100% acrylic.
So we start by casting on 60 stitches. Row 1 knit Row 2 knit 30 stiches and purl 30 stitches. Repeat these two rows 20 times ( so you have 42 rows)
Row 43 knit Row 44 purl 30 stitches then knit 30 stitches Repeat the last two rows 20 times ( now we have 84 rows) cast off
Finished square:
Ok now knit another 15 squares (depending on how big you want the blanket you can knit more!) Sew them together Crochet round the edge and you are done!
">
I would love to see your blankets so please send us a photograph and we will share it on IACW.
Thanks for visiting and love from Di XXX

Monday, September 10, 2007

Crochet blanket update

Hi from Caz!! :)
4 weeks ago I posted a project that I was embarking on..............to make CROCHET blankets for my nieces for Christmas, and I am very pleased to report to you today that I am 1 down, only 1 to go!!!!!!!!
I am only this far because I had my dear mad mother 'Di' here for two weeks to help me, lol. We worked very hard to get the 224 squares for the first blanket finished and I have spent a few weeks working hard to put it all together.
So today I am going to show you how to finish off the blanket and a give you a few tips from my mistakes.
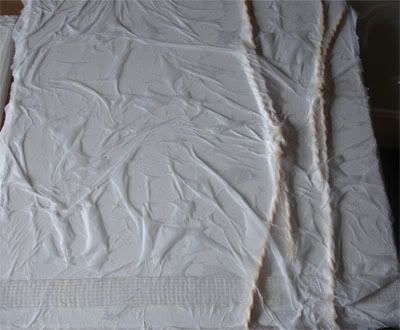
Once all the squares are finished you need to lay them out on a piece of fabric, an old sheet will do, for mine we bought a piece of calico. (please excuse my not so great photos but I had no intention of trying to move this down to the garden to take pictures!!)
Lay all the squares out, at this point we weren't too fussy about how we lay them out because there isn't a set pattern. But once we had them down we did look to see if there were any 'patches' of the same{ish} colour ways that stood out.
The next task is to get all the sqaures pinned to your fabric, this is a BIG job!
Once they are all pinned down, roll the fabric from the bottom into a big sausage. When you are ready to crochet the squares together, unroll the 'sausage' just enough to be able to see the rows you are working on, and at the end of each joined row, remove the pins from the top row.
When you have finished crocheting all the rows one way, you will find doing the perpendicular ones a little easier as the blanket will be off the fabric.
You can now crochet all around the edge of the blanket!
And there you have it! One completed 'hand made with love' Christmas gift :)
Things I learnt making this blanket!
You need to concentrate just a little, lol, or else you will land up with very funny looking squares {heehee}
Don't start to crochet a row together unless you plan to get to the end in one sitting {crochet stitches unravel themselves if left unattended!}
Give yourself enough time to finish the blanket if making one as a gift {a project this size will become a chore if rushed and a chore is not enjoyable!}
Make sure the wool you use is easily available, we needed far more of the base colour (purple in this blanket) than we originally thought {we bought ours in Wilkinsons and thankfully there was always a good supply on the shelves!}
I still have another blanket to make and so far I have completed 5 squares! Only 219 more to go :)
Don't forget to check back in month for an update!!
haPPy creATing!
Caz
xx

Sunday, September 09, 2007

Canvases and Backgrounds

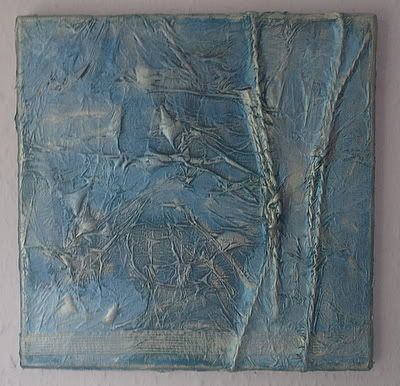
Hello :) It's Angela here again, thanks again to the IACW girls for inviting me back as a Guest Designer. Today I want to show you a couple of canvases that I have been working on over the last few weeks.
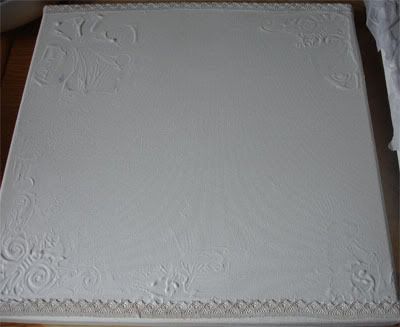
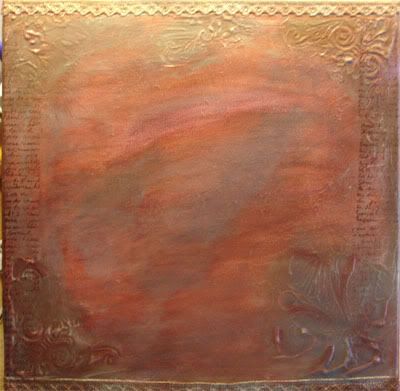
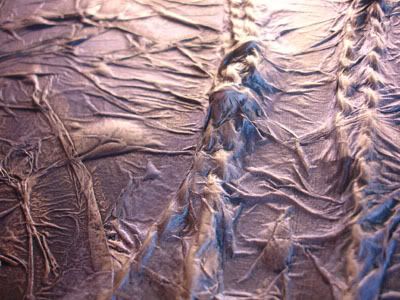
This work is inspired by Maggie Grey. Supplies: 12x12 canvases PVA glue String White tissue paper Ribbon Lace ribbon Gesso Foam stamps Adirondack Paint daubers in various shades Daler Rowney's Interference Mediums Metallic Rub On waxes Brilliance Ink Script Rubber Stamp Golden Gel Medium Photocopied Image For the first canvas, I covered the entire surface with PVA glue I then got two pieces of thick string and tied knots in them. This was then stuck to the canvas again with PVA, and a piece of textured ribbon was adhered along the bottom. This was then covered with a layer of whitetissue paper, then added more PVA glue and then another layer of white tissue. This was left to dry. I then painted over this using Ranger's Paint daubers in denim and stream colours, dabbed randomly and then mixed on the canvas using my fingers, and sponge paint brushes. Once this was dry I highlighted the string and ribbon covered areas with some more stream coloured paint. Once this was dry, I used Daler-Rowney's blue interference medium over the top. Once this was dry, I rubbed over the raised areas with blue metallic rub-on wax to pick out the detail. The finished canvas looks like this: For the second canvas I used gesso (gesso is a substance used to prime surfaces for painting - it is like a thick acrylic paint). I applied the gesso using a palette knife, making sure that the edges were covered in a heavier layer of gesso. I stamped into the edges using foam stamps. It is important that you wash your stamps through thoroughly immediately so that it doesn't dry on your stamp and damage it.
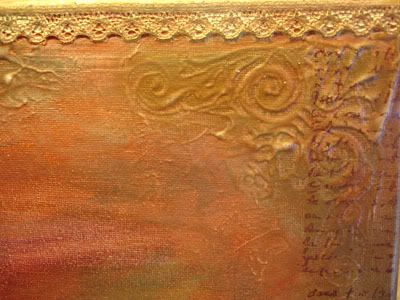
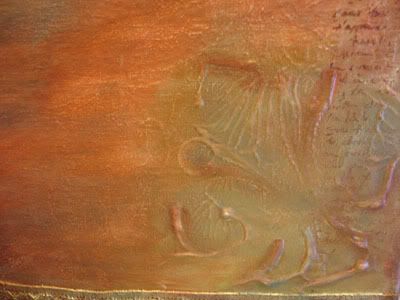
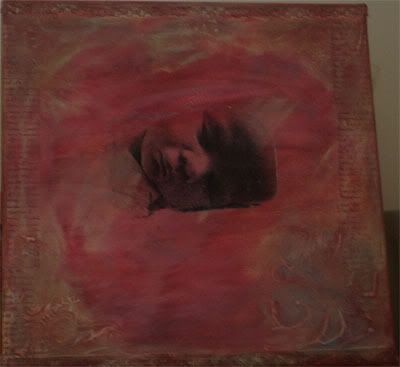
I then cut two thin strips of lace and adhered them to the top and bottom of the canvas by setting them into the gesso, I then covered this with gesso using my fingers, dabbing it into the holes in the lace to make sure that it is properly stuck down. Leave this to dry overnight. Again this was painted with Ranger Paint daubers in Cranberry, butterscotch and a tiny bit of stream. This was worked into the canvas, into the ridges left by the gesso and into the lace. Once this was dry it was highlighted with red and gold interference medium by Daler-Rowney. The stamped areas were then highlighted with metallic rub ons in green, gold and red. This is the main technique for the backgrounds. I was happy with the first as it was, it didn't need anything else added to it. The second canvas had a large area in the middle that needed something, so I did an image transfer using golden gel medium and a photocopy of an image of my son and stamped with a script stamp using brilliance ink onto the side of the canvas. These techniques are really simple and easy to do and give great effects, they would even work on book covers and many other surfaces. ~angela~