
Don't forget that you have until the 31st August to let us have your child's creations. Simply email them to us at acreativeworld@hotmail.co.uk.


Don't forget that you have until the 31st August to let us have your child's creations. Simply email them to us at acreativeworld@hotmail.co.uk.
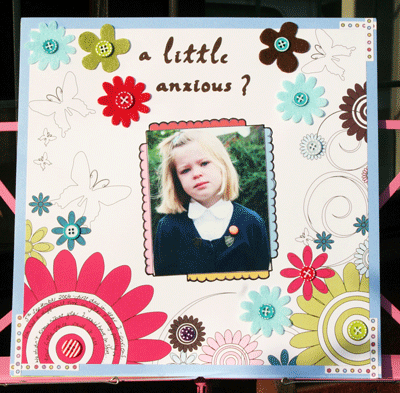
 My elder daughter was joining year 2 last September, and her year 1 had been quite difficult for her, due to a period of ill health. I knew that she was anxious about going into year 2, and her face on this photograph told me all I needed to know about exactly how she was feeling. Thankfully, she connected with her fantastic year 2 teacher almost instantly, and had a brilliant year with her. I have journalled my feelings and her feelings about starting year 2 around the circles in the bottom left portion of the layout. I didn't want to do hidden journalling, but I also didn't want the journalling for this layout splashed across the page.
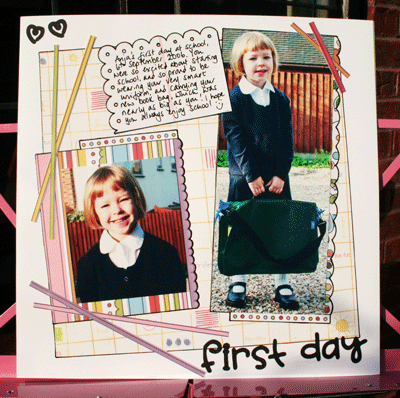
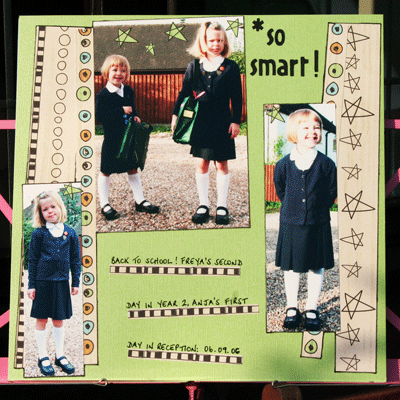
 I absolutely LOVE seeing my girls in their new uniforms at the start of the new school year - they look so smart (for about a week!!!) and their shoes are pristine. I wanted to do a layout showing just how smart they look.
 With thanks to my lovely friend Debbie for letting me have a play with her Cricut to cut my titles for these layouts - much easier than cutting them by hand!
More school-themed layouts on the way in September, when Trish will be celebrating and commemorating 'starting school' :)
With thanks to my lovely friend Debbie for letting me have a play with her Cricut to cut my titles for these layouts - much easier than cutting them by hand!
More school-themed layouts on the way in September, when Trish will be celebrating and commemorating 'starting school' :)Have you seen the stamps that are kicking up a storm in the USA and are rapidly getting a fan base over here in the UK - Bella Stamps. Gosh, I am totally hooked! I think this may be the first of many 'Bella Cards' on It's A Creative World.

Adhere paperfrill to pink card, trim and ink edges to create a paper 'ribbon'.
Attach to card, line up both sides so that they are even before gluing!
Stamp 'Bella' using Staz-on ink and colour with watercolour pencils or paints, mat onto pink cardstock and ink the edges using charcoal chalk ink.
Use foam pads down one side of you stamped image to attach it to one side of your card.
Trim a piece of patterned paper to fit inside your card, ink the edges and glue in place.
Trim a plain piece of paper, doodle around the edges and glue in place. Now you have somewhere to write your message.
Voila! A funky Bella Card.

(Pink Petticoat and Costco paper, Doodlebug paperfrill, Colorbox chalk ink, Bella Stamp)
 Cut around the rub-on that you want to use and sellotape it to the bucket in the correct position. I found this the easiest way to keep my rub-on in the right place as the bucket did tend to roll when it was on my table. Follow the instructions on the pack to apply the rub-ons to the bucket, most come with a little stick for rubbing over the top sheet but use a lolly stick if not. I used the letters to spell out the word 'peg' and then two flowers to grow up either side. Take your time to position your letters so that you get them centred. I sellotaped each letter individually to spell out the whole word before starting to rub them on.
 Decorate your handles with ribbon scrap, I knot them twice to stop them becoming loose.


Amelia is seven and drew herself outside our house on a lovely sunny day.
We would love to see the masterpieces that your children create. All you have to do is email their masterpiece and a few words about them to acreativeworld@hotmail.co.uk before 31st August.
 And how about these wonderfully shaped coffee jars also made of glass - and they are free.
 Then to the crafty room. You may remember that I just put all of my ribbon and buttons into a BIG plastic container:

 These jars are available from Ikea.
Ok and she also uses glass for buttons :
 But she has recycled jars - her old spice jars!
 When I retired in January I planned to sell my home and so went on a major mission to clear the clutter. I planned a garage sale which was great and raised a lot of cash!!! What was left I donated to charity and they too raised quite a bit!
OK I did go a bit far! This was my spare room...
 and this is it now....
 But I did mostly get rid of stuff that I did not use, or did not know I even had! My home, and cupboards are now filled with beautiful SPACE.
So a challenge, get organised and clear the clutter. Don't try to do it all in one day. Take just one cupboard at a time. You will be surprised and what you find, throw out and how GREAT you feel when it's done...You will create lots of space and energise your home.
Caz has risen to the challenge and the "magpie" has started to clear the clutter!!! A quote from her blog
"Today I have been clearing out. I have too much clutter in my house and I feel like I am drowning in it. I started with my books. Next stop is the coat cupboard! Isn't it amazing how much we collect over the years, little things that we can't possibly throw out :) Well my challenge is to find the strength to get rid of things that just take up space and serve no purpose!"
"Well yesterday I managed to clear loads and start my big declutter, it felt so good to finally get some order back into the house. I still have some way to go but at least I have made a start :)"
Oh don't forget the children's art competition. We are so excited to see their work!
Finally, remember the easy peasy mini album we showed a few weeks back, well Charlotte (post from August 2nd 2007) created this album (Christmas memories) and agreed that we can share it with you...

 Thanks Charlotte for sharing this with us, we do love to see what you create!!!
Thanks again for visiting love from Di XXX
Glue a toning length of ribbon across card and trim edges with sharp scissors to prevent fraying (I keep my ribbon and fabric scissors seperate to my paper scissors so keep them sharp).
Stamp an image with a permanent ink pad and colour with watercolour paints of pencils, trim to size and ink around the edges with black chalk ink. Attach to your card with foam pads to raise the image from the background and give extra definition.
Select co-ordinating buttons and attach with strong glue down the side of the card or you could add a sentiment instead of buttons
 (Striped paper from Shabby Princess, Ribbon from Amercan Crafts, Buttons by FooFaLa, Stamp by Tilda at Panduro)
| provided by www.hit-counter-download.com |