Saturday, August 11, 2007

Trip Memories

How often do you go on special outings and trips with friends and family members and what do you do with all the photographs that you take? Hopefully you download them to your computer and then make back up copies on CD - how often have we heard of a computer crashing and someone losing all their memories which were stored on the hard drive. It's nice to give your friends and family a copy of the photographs so that they can remember the trip but if you are anything like me the Cd's just get added to an ever growing pile.
Not this one though - I visited the Zoo with my friend and her young daughter and we had a great day out. When I came back home I used some of the photographs to create my scrapbook pages and then made a decorated CD holder to hold the CD of photographs that I made to give to Hanna so that she and her Mum could print some out and look at them on her computer.
I used a free CD that came in the Sunday newspaper as a template for my cover. Run your craft knife down the glued edge and open it out flat and draw around it onto your chosen paper. If you use a double sided paper then you don't have to worry about decorating the inside.
Use chipboard letters and left over pieces of patterned paper to decorate the front and I used small alphabet stamps to make letter tiles to personalise my cover.
Burn your CD and drop into the cover and hey presto! you have a personalised CD cover which certainly won't get lost in the crowd and it only takes minutes to make.
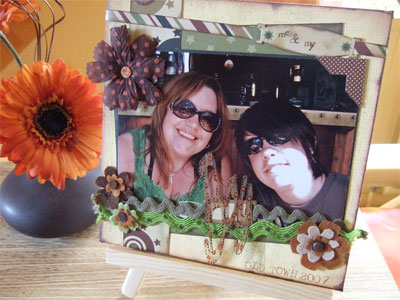
(Papers from Early Learning Centre, chipboard letters by Scenic Route, alphabet stamps by PSX)
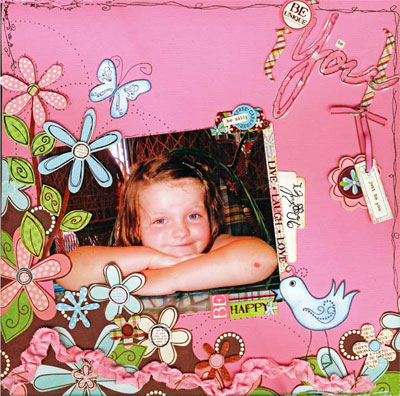
I hope this gives you some ideas for keeping those trip memories safe
Andrea xx

Friday, August 10, 2007

An apology, and some beautiful artwork!

Regular readers of our daily blog will know that we recently welcomed Jakey as a Guest Designer, and her fab project and instructions on how to make 'ghost' letters from transparencies appeared here. I had my woolly head on when I put the article together, because I omitted to include the fantastic artwork Jakey had submitted to accompany her instructions, and I apologise whole-heartedly to Jakey for this oversight, and am now delighted to bring you the pictures which should have appeared with the original post. jakey-project-1 jakey-project-3 jakey-project-2 Thanks again, Jakey - we loved your project!
**And please see below for a second, bonus Friday post!! **

T-shirt transfers - a great gift idea!

Hello :) It's Jo here, bringing you a cheap, simple, effective, and relatively quick and easy project which would be ideal as a child's birthday gift, or even, if time allows, as a substitute for a party bag - something to keep, and much better than a ton of sweets!!! There are several different t-shirt transfer packs on the market, but I've used the HP ones, simply because they are compatible with my printer. At first glance they sound a bit pricy, but at roughly £10 for 10 sheets, and with the probability of being able to fit two designs onto one sheet, they can work out at as little as 50p per t-shirt. You can find them here but you should also be able to find them at any good stationer's, e.g. Staples or larger branches of WHSmith. I bought our plain t-shirts and baseball caps from here, and was really pleased with the quality and bargain prices, but again, any plain white t-shirt will suffice. Apart from the t-shirts/hats, computer + printer, and transfer pack, all you need is a very hot iron, a pillowcase (to put beneath the garment whilst ironing), and a hard surface on which to iron (HP recommend that you don't use your ironing board, although I have to confess that I did, and the results are absolutely fine!) If you have an eye for a bargain, you can make up these t-shirts for less than £2 each, and the fact that you can personalise them for gifts is an added bonus! t-shirts-post-1 As far as the design goes, your only limit is your imagination. I had a play around with several ideas, and used different fonts and colours until I was happy with my designs. I started off intending only to do t-shirts for my daughters, but was so pleased with the results that I did one for me, too!! The transfer packs contain all the instructions you need, but when I came to look in my already-opened pack, to my horror, the instructions were missing. No need to panic, though - the excellent HP website has the full instructions here, and it was as straightforward as I'd remembered. So, here are the designs we settled on: slogan-3 fonts used (from top): Lucida Handwriting (130pt) Times New Roman (130pt) slogan-2 fonts used (from top): CK Anecdote (170pt, bold and italics) 2Peas Tattered Lace (150pt), 2Peas Weathervane (100pt) slogan-1 fonts used (from top): 2Peas Tokyo Girl (200pt) 2Peas Starlet (150pt) And here are the finished results! t-shirts-post-2 t-shirts-post-5 And these are the hats, which were a little more difficult to do as it was quite hard to get them flat enough to iron onto, but I persevered, and they worked out fine! t-shirts-post-3 Happy crafting, everyone!!

Thursday, August 09, 2007

Quick Cards

Whilst I was out shopping this week I called into one of those shops where you can fill a box with A4 card for very little cost. Whilst I was standing in the queue I spotted a pack of patterned paper strips and a pack of 12x12 paper in the same set. As it was wrapped in cellophane I decided not to risk buying the large sheets in case they weren't really my style but thought I would risk the paper strips for £2.99. I'm really pleased with my purchase as the paper has such lovely designs for cards for children, both girl and boy patterns and now I think I'll have to return to the shop to buy the larger sheets!!
When I got home I was so pleased with my unexpected purchase that I started to make some cards for my 'drawer' - a drawer under my desk filled with a collection of quick and easy cards that I can just grab when I forget someones birthday or need a card quickly.

Birthday Girl

Step 1

Cut A4 card into half length ways and fold each half to make a landscape card blank.

Step 2

Ink along the edges of a patterned strip of paper with black charcoal ink and adhere to your card blank.

Step 3

Ink around the edges of your card with chalk ink.

Step 4

Attach two lengths of coordinating ribbon above and below the patterned paper (I used a dry glue runner as opposed to runny glue so that it wouldn't seep through the ribbon).

Step 5

Stamp individual letters for the sentiment, trim and edge with chalk ink. Adhere to card overlapping the ribbon.

Birthday Boy

Attach strips of spotty paper to the top and bottom of the card blank and a strip of patterned paper across the middle, use alphabet rub ons to spell the word birthday and chipboard letters to spell the word boy, ink around the edge of the card with black chalk ink.

We have our very own 'birthday girl' today here at A Creative World,

Happy Birthday Maria!!!

Have fun cardmaking, Andrea xx

Wednesday, August 08, 2007

We're Cooking with Gas today!!!

Hi folks from Caz and Di.
Yes we are 'cooking' today. Two summer barbecue ideas for those great summer days still to come. Caz's "colourful vegetable kebabs" and Di's "decadent brown onion potatoes" (to di(e) for).
Caz's Colourful vegetable kebabs: Ingredients
peppers (the more colours the better!!!)
about 12 mushrooms
3 onions
(you can also use cherry tomatoes, dried apricots, courgettes, marrow etc.) Preparation:

Chop the cleaned peppers and peeled onions into big chumks

Leave the mushrooms whole

Now just alternate the veggie bits on to skewers or kebab sticks (if using wooden kebab sticks then soak in water for at least 1 hour before assembling the kebabs and cook straight away)Marinade in a mixture of olive oil, crushed garlic clove and mixed herbs (origanum or whatever) Cook on the barbecue until tender or crunchie enough to eat (depending on your taste!!! )

Di's decadent brown onion potatoes: Ingredients
Potatoes ( I normally use a baking potato per person and add a few for seconds)
1 packet of brown onion soup (per 8 potatoes)
200gm butter (this is the decadent bit!!!) (per 8 potatoes)
Preparation:
Scrub the potatoes and partially slice
Melt the butter in the microwave or a saucepan
Add brown onion soup mix to the melted butter and stir
Lay the potatoes in a roasting dish sliced side up and coat well with the melted butter mix
Cover with tinfoil and cook for 1 and 1/2 to 2 hours at : 180 degrees C / 350 degrees F / gas mark 4

We had great fun making and eating these yesterday - they were scrumpdiddlyumptious... eNjOy!!!

Love from Caz and Di

Tuesday, August 07, 2007

Entertainment for a rainy afternoon

Hi, it's Maria here again. I really do need to apologise as I have just come to put my post together and our *lovely* dog Lucy has set about the props. As I have no piccies to share I thought that you could see the culprit.
Todays post was going to be about making pom pom animals but I foolishly left them within her sight and reach. Hey ho, we can make another set and share them another day. Note to self take photos immediately as you never know what will happen!!!
While the sun is shining we can all escape and make the most of the Summer holidays. But, you just know that it will be raining again soon and cries of *I'm bored* will echo around the house.
Here I am going to share some of my favourite sites that I often call on to while away a rainy afternoon.
Fototiller - Make fun colouring pages from your favourite photos. You could even make up an album to give to a favourite relative as a pressie.
Enchanted-Learning - Over 20,000 web pages full of craft and project ideas. Whatever your child's interest you will find something here.
Coloring-Nicole - A fabulous blog full of FREE colouring pages to print off.
DLTK - A huge range of printable crafts and hobbies.
I hope that you find some of these useful for your children and I will endeavour to find some new links to share with you soon.
Once again I am very sorry for the *emergency post* but I hope that you found it interesting. Now that you've seen the culprit I'm sure that you'll appreciate that I couldn't stay cross with her for long.
Toodle pip

Monday, August 06, 2007

Creative children

Hi, it's Maria here. I hope that you all had a fabulous weekend and made the most of the sunshine. The girlies here at It's a creative world love the idea of including children in our creative fun. I know that my girlie wirlies while away many an afternoon cutting and sticking. With this in mind would love to see the masterpieces that your little ones create. We put a call out recently and here are two of the entries we have received.

The first is from Jonathan Collett age 2. Mum said *This is a fish collage I made with my son Jonathan in January for his Godmother's birthday - he chose a fish to make and did most of the glueing himself. He is 2. He loves "blueing and sticking" and always wants to join in when i have my scrapping stuff out*. I love this as it reminds me of lovely days spent on the beach collecting shells. Are we the only ones who can barely walk under the weight of pebbles in our pockets? Then there is the small matter of distracting the girlie wirlies so that we can return them to the beach where they belong!!! Our second entry is from Matthew Willis age 5. This is his very first scrapbook page featuring his very own drawing of Sportacus from Lazytown. Matthew is the son of Jo the *super shopper* on UKS.

This is another hit for me as I am rather partial to a bit of Sportacus in the morning just don't tell my husband ............ Hee hee.
We are hoping to showcase as many masterpieces as we can and all entries will receive a certificate. There is also a special something for one lucky artist at the end of the summer holidays.
So, what are you waiting for? Dig out the paints and get creating.
You can email your entries to us at itsacreativeworld@hotmail.co.uk
Toodle pip

Sunday, August 05, 2007

Photography

So as scrapbookers we are all passionate about our photographs. Some of us are just point and shoot for the moment with small digital cameras, some of us take time to set the moment and have expensive digital SLR cameras. Whichever photographer you are the end result is the same, you are inevitably going to scrap that photograph.
Tips for better photos Take LOTS of pictures. The best way to achieve great pictures is to take lots and lots of them. Your chance of taking a great photo increases by taking more photos. Also, if the subjects like to perform for the camera, after a while, they will get tired of performing and you can get some real life action shots.

Avoid distracting backgrounds. How many times have you had a photo of someone that you really love, but there is a pile of dirty dishes on the sink behind them or a tree branch sticking right out of the side of their head? There are some things that cannot be avoided, but if you carefully consider the entire frame of your picture, you will have more successful results.

Use natural light. The flash and sunlight can both cause harsh shadows on your subjects, so try to shoot pictures near a sunny window. When it is cloudy outside, that is a perfect time to encourage your subject to come outside for a quick photo shoot. Without the harsh sun shining down on them, they will not be squinting or have bright spots on their faces.

Here are a few tips for taking better photos of the important people in your life.

Get close to your subject and focus on their face. Most people want to take full head to toe body shots. Avoid taking full body shots unless the clothes are your subject. For example the person is wearing a costume or uniform take a full body shot otherwise stay focused on the face. Make the person the centre of your photo by getting up close and personal.

Use the right lenses for taking photos of people. A high powered zoom will allow you to get up close features without getting into your subjects personal space. Avoid wide-angle lenses they will distort facial features. When kids are your subject get down to their level to take the photo. Focus the camera on the eyes of your subject.

Photograph your subjects while they are engaged in other activities. For example do you have a self proclaimed chef in the family? Photograph them making their world famous lasagne. Have a little one in the family that is learning to read? Photograph them with their nose tucked into a book.

Capturing the personality of the person in a still photo is truly an art form. The more photos you take you will become more confident and increase your chances of taking that amazing photograph. Here are ten more of the top ten most common photo mistakes that scrapbookers make, and how they can be avoided.

Forgetting the camera - Alright, we have all done it. Either carry a disposable camera, or purchase one that can fit into your purse. Try to be sure you always have your camera handy.

Red Eye/Pet Eye - While sometimes, there is just no way to keep it from happening, red eye and pet eye can be controlled somewhat. If you are able, turn on lights or adjust your subjects. If you wind up with photos that are full of red eye, either use a red eye pen or a computer software program that can help remove it.

Sloppiness - How many times have you gotten a roll of film developed or now in the digital age, uploaded a photo to your computer, only to find out that you have a photograph with a head cut off, or something growing out of someones head. The best way to avoid this problem, is just to pay attention. Try to centre your subject until you become better.

Parallax - What's that? It is when you are too close to the subject you are photographing which is common with a point and shoot camera. Just back up and keep your hand as steady as possible.

Out of Focus - This usually occurs when the subject is moving. Or perhaps the photographer moved slightly. Try to stay as still as you can, and work with the focus until you get it right.

Camera Shake - This is actually more common than we would like to admit. Usually occurs when the wind is blowing, or the photographer moves or shakes slightly. The only way to help is to keep the camera as steady as possible or use a faster film. Since using a faster film is not an answer for a digital camera, keeping your hands steady is the only option. Keep elbows close to your side, and take a deep breath and hold it right before you press the button.

Back lighting - Usually this means shadows on the subject or a darkened face. Try moving into the shade and position the subject so the light is on them. You can also zoom in on the subject or use the fill flash to help combat back lighting problems.

Poor exposure - This isn't as much of a problem with modern technology what it is. Digital camera's don't usually have this problem. With a film camera, the reason for poor exposure is typically because the film is too slow for the type of photo you were aiming for or you did not use a flash.

Partial Obstruction - The finger over the lens or the lens strap in the picture! Or maybe just dirt or dust on your lens. Be sure and check your lens each time you are going to use your camera. Also carry a soft camera cloth with you to wipe the lens frequently while you are using it.

No picture at all - Haven't you ever had that happen? You know you took the photo, you might even remember setting it up. But there was no picture there. Sometimes this happens because the film was not loaded properly, the shutter wasn't pressed firmly, or maybe you forgot to load film if it was a film camera. With a digital camera it is more commonly the issue of not having the shutter released completely. Just be sure to press firmly.

Holiday Snaps Before You Go A point-and-shoot camera will do for most trips. Bring extra memory cards and lithium batteries or your rechargeable battery and charging thingie. If using film, budget two rolls per day (400-speed is the best all-purpose). If it is a big deal trip--read travel books before you go (so you’ll know not to miss sunrise over the Serengeti) and by all means, bring a notebook, everyone tends to forget the details. Some cameras will record voice notes, but it uses a bunch of memory card space. Let There be Light Midday light is the very harshest. Try to take pictures in the morning and late afternoon when light is soft, the darks and lights are more balanced and all looks peaceful. Overcast days are great, too. Stand at least three feet from your subject so it will be in focus — but not too far or all you’ll get is background. The best composition keeps things a little off-centre. In general, flash works best within 15 feet of your subject. Is the sun behind you? It should be. Add drama to your composition, try shooting through natural frames like doorways and windows. Sun, Sand, and Sea Sand + cameras = disaster. Wind + sand is even worse. Pack a disposable underwater camera, these can be really inexpensive. Place the horizon in the top or bottom third of your picture to avoid bisecting a lovely scene. And it might seem strange to select “fill flash” in brilliant sunlight, but it will do wonders for dark shadows in the shade from the bright sun. By the way, the sunset rarely looks as good on film as it does in person, so don’t miss it fussing too much with the camera. Subjects Do Matter There’s nothing more mind-numbing than clichéd vacation photos. When documenting your trip, try to think in terms of a narrative. One idea: Take snapshots of great meals before you eat them, cool reflections on the water, or your best friend or kids passed out in the passenger seat. Shooting pixs of road signs help you remember where you’ve been. Take out your camera when everyone puts theirs away. Fun memories can include candid pictures of you travelling companions as they are packing, waiting in the airport lounge, or haggling with cab drivers. These may end up being favorite keepsakes. Family Fun When photographing the folks, keep it simple. If you photograph groups, arrange them against plain backgrounds and don’t waste time or energy trying to pose kids or pets. Get in fairly close, shoot at your subject’s eye level (that means squat down if they’re little). Try for action shots whenever possible. Some cameras have a 3 shot burst mode--check your manual before you leave town. Put your travelling companions in your 'postcard' scenes. A silhouette against a vast seascape is more interesting and meaningful than just another postcard picture. Bummed Out ? The worse the travel conditions and circumstances, the more important it is to take pictures. Record the moment when everyone discovers the Polynesian “villa” is really a “shack.” Or when you get lost in the rain forest, the photos of the wrong paths and your dirty, exhausted feet will make funny commentary at a later date ! I hope you've enjoyed this little Photography slot. It will be the first of many i hope Cath x
Credits to - ScrapbookScrapbook & Scrapbookingfamilies