Saturday, November 03, 2007

New Home Gift

Good morning to you!!
Today we have another great idea that is quick and easy but fun to make :)
I made these new address cards for my brother and his girlfriend who finally moved out of our spare room and into their own home.
They took about 25 minutes to make and are printed onto white 6 x 4 postcards that I bought in our local office supplies shop for about £1.00 a pack.
I created a new file in photoshop and used the doodled house from the font 2Peas GGs Love Me (downloaded from 2peas) to create a border of sweet little houses. I increased the size of the middle house to make it stand out and added colour with the paint bucket tool. I saved the image as a j-peg. Create a new document that is 6" x 4" in your word processing programme and import the house image to create a border along the bottom of your document. Add the text and print out. I doodled a red border with felt tip around the edges.
Stack the cards onto white envelopes, tie up with red gingham ribbon and a white wooden heart and you have a sweet and very individual present that looks like it took hours to make but in reality took less than half and hour
Andrea
xx
And if you thought the giving was over you are mistaken!!
The lovely Kate Hadfield has made these In the Pink Journalers especially for you!!!

Friday, November 02, 2007

Matching Home Decor Accessories

Well, I don’t know about you, but I find it hard to buy accessories for my home in the right colour scheme, with matching items for a reasonable price, today I have made a couple of small items using 2 sheets of patterned paper, 1 sheet of cardstock, ribbons, lace and small embellishments that we all have lying around in our stash.

First, the box, it is an MDF given to me by a friend, I sanded it all to give a key, and then painted it with a deep red acrylic paint, it needed two coats to cover it nicely. I cut and inked patterned paper to cover the top and all four sides and used permanent spray adhesive to stick it to the box. I then used lace and ribbon, a button and a couple of metal embellishments and fiddled until I was happy with the result. I used a gold marker to go round all the edges of the box to give it a bit of a lift. The candles were taken from a class in a cyber crop a couple of years ago by Debbie I used the same patterned paper and card to match to wrap the candles, and used brads to secure the paper and card at the back. I used the same ribbon and lace to tie round the centre to finish them off. These all sit in my living room and do get commented on by friends and family. I hope you have enjoyed today’s post and will get some inspiration from it. Trish xxx

And we almost forgot the winner from our last October lucky dipper is Sharon Peters. Please send your address to us at acreativeworld@hotmail.co.uk and we will get your prize to you!

And sorry about confusion yesterday I did not realise that we had THREE Janes who contributed layouts so the winner of Andrea's beautiful pink collection for the scrap your boobs layout is JANE with her LO titled "Big, Small, Men an' all"!!!!

Thursday, November 01, 2007

And our bosoms extravaganza draws to a close

When we first discussed the idea of raising money and awareness for breast cancer month we had no idea how you, our readers, would take it. Would you read it and move on to the next blog or join us? We truly hoped that you would join us but had no idea how it would pan out.
Well, what can we say? It's not enough to say that you joined in as you picked it up and ran with it. We hoped to raise £310 but had no idea if we would manage it. We beat our target and are hoping to go on and double it before the end of the year. Call us optimistic but we really believe that with your support we can do it.
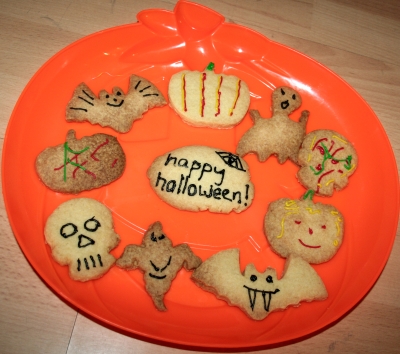
But, it's not just about raising money it's about Women standing together and supporting each other. So many of us have been touched by this dreadful disease in some shape or form but we won't bow down to it. To show her support Di has put together this tribute for all women.
Today we want to remember survivors and those that lost the fight. Not just to this disease but to all forms of cancer.

Angela would like to say a few words about Auntie Margaret

My DH's dear Auntie Margaret survived Breast cancer in the early 90's, long before I knew her. Sadly while I was pregnant, she discovered that the cancer had returned and spread throughout her body. She fought very bravely through what was a terrible illness.

Auntie Margaret passed away 3 weeks before my son was born. I will always be sad that Daniel never got to meet his Auntie Margaret, but we tell him about her all the time, and have a little jumper that she knitted for him. She went out of her way to make me feel like family from the very beginning.

She was such a lovely, amazing lady, who always tried to make everyone feel welcome, I will never forget her encouraging smiles at large family events when she knew I was nervous, and how she had a hug and a kind word for everyone.

I hope that what we have done this month will help people to be more aware about breast cancer, and that through early detection hopefully a much more positive outcome for everyone.

Di would like to remember her Mum, Caz's Gram.

My mum was a legend in her own lifetime. When she was diagnosed with a rogue cancerous brain tumour we her family were devastated but inspired by her courage. She underwent radio therapy and died in my sister's arms just after undergoing her last treatment. We were blessed during the last 3 months of her life in that we all got to see her and spend time with her. She is a hard act to follow and still inspires us. She was Mum, Gram and friend. This is the last photograph I have of her and it was taken by my niece Danni. She had begun to lose her hair and wore this lovely hat!

We loved all of your bosom layouts and could never pick a favourite to showcase. But, a special place in all of hearts is now taken up by Kat's Mum. Kat's layout is so inspiring and we wish her Mum all the best for the future.

To celebrate the end of our *Bosoms extravaganza* the fabulously talented Kate Hadfield has designed two sets of pink digi doodles exclusively for It's a creative world.

You can download the first set here and the second set will be available this weekend.

And what a difficut draw this morning coming from donations, layouts and comments. But the winner is Diz who wins the goodie bag from Scrapbook Inspirations!!!! Please email your addy to acreativeworld@hotmail.co.uk and we will get you prize to you!!!

We have lots of prizes today so keep coming back to us! We have prizes for donations, layouts and comments . We will be announcing the Scrap your Boobs layout winner at about 9.00am this morning.

Thank you all so much for making October a memorable month! Your layouts, donations and comments have been AWESOME!!!

9.00am prize winners!!!

And the winner of Andrea's beautiful pink collection for the scrap your boobs layout is JANE with her LO titled "Big, Small men an' all"!!!!

The winner of the donations prize is Jackie! well done. You have won from A trip down memory lane - Pink craft mate tote.

1.00pm prize winners!!!

The prize for layouts, donated by Caz, a Pink pamper kit goes to Karen with a layout titled TLC

The prize for doantions, sponsored by Papermaze goes to Lesley Susan Pearcey

5.00 pm prize winners!!!

The prize for layouts, sponsored by Design Collective, a months membership, goes to Natalie and her *learning to love my skin* LO

The prize for donations, sponsored by Scrap Magic, a colelction of PINK bazzill, goes to Ceruleanblue!!!!!!

9.00pm prize winners!!!

Teresa Mitchell is the Layout winner, she wins a months subscription to the Design Collective!!

And the winner of a £10 donation by Di in their name is Charlene Marie Lee!!

Please email your addies to us at acreativeworld@hotmail.co.uk and your prizes will be on the way!!!

With love and thanks from IACW XXX

And, as an extra thank you there will be a lucky dipper for all the comments left today. The winner will receive a months free membership to the design collective. The winner will be published tomorrow.

Wednesday, October 31, 2007

Messy hands at Halloween!

We have another Winner!!!!!
JENGA wins the Scrapping Angels kit donated by Anna @ Scrapping Angels.
Please email your addy to acreativeworld@hotmail.co.uk
Thank you to everyone who left a comment :)
And of course the fun is not over yet! Everyone who has donated, sent in a LO up to the end of today and leaves a comment on todays post will go into a big lucky dipper prize draw to win a goodie bag from Scrapbook Inspirations!!!!
My children like nothing better than getting their hands dirty, so I thought I would give them a couple of opportunities to really get stuck in and get creative on a Halloween theme. Halloween 3 First on the agenda – Halloween shortbread. We used a very straightforward shortbread recipe: 225g butter 125g caster sugar 350g plain flour, plus extra flour for dusting a pinch of salt Cream the butter and the sugar together in a large bowl. I let the children take turns at doing this, before giving it a final go myself. Sieve the flour and a pinch of salt into the creamed mixture, and combine the ingredients to make a doughy mixture. Again, rubbing the flour into the fat and sugar is wonderfully messy and this is the part where we usually have arguments as to who has had the longest turn!! Halloween 2 When all of the ingredients have been completely rubbed in together, gently knead the doughy mixture for a few moments, and form it into a smooth ball. Wrap it in clingfilm, and put it in the fridge for 15 minutes. Pre-heat your oven to gas mark 4, 180 degrees C, 350 degrees F, and grease a couple of large baking sheets. When the biscuit mix is ready to come out of the fridge, sprinkle some flour onto your work surface, and your rolling pin, and gently roll out the mixture to about a 1cm thickness. We used Halloween cookie cutters bought this year and last year at Tesco, and took it in turns to cut shapes from the dough. Keep reforming the dough ball and rolling out until all the mixture has been used up. The biscuits need to go into the oven for 15 minutes, but check them at around 12 minutes because if your oven is on the hot side, they'll probably be done! They just need to be golden, and more on the golden side than the brown side (I write from experience on this one!!!) When the biscuits are cooked, take them out of the oven and transfer to a wire cooling rack for as long as they need to cool down. This is the part where you might want to have something else to occupy the children, as mine wanted to decorate the biscuits as soon as they were cooked, and they really do need time to cool otherwise the icing won't stick properly. I had my dear husband, a very large pumpkin, and a pumpkin carving kit at the ready, and while the biscuits were cooling, the girls helped their dad to prepare the pumpkin ready for him to carve - another extremely messy job!! Halloween 4 The girls had great fun scooping out the stringy bits and seeds, and it took just long enough for the biscuits to have time to cool. I bought a four-pack of writing icing, and let them do their own thing. Halloween 5 Here are the finished biscuits - we still have a few left to enjoy today! Halloween 8 And the results of the pumpkin carving? Using the Tesco pumpkin carving templates, a friendly ghost on one side, and a fiendish face on the other: Halloween 7 Halloween 6 We also found time to make these orange chocolate lollies using this Supercook kit. Halloween 9 H*A*P*P*Y H*A*L*L*O*W*E*E*N to all our readers! Don't get spOOked!

Tuesday, October 30, 2007

Mix it up!!

Hi Folks!!!
And we have another lucky dipper prize today for our Scrap Your Boobs campaign. Its an A4 sheet of Zettiology rubber stamps donated by 3D Jean and the winner is Hazel Harris. Please email us your address at acreativeworld@hotmail.co.uk and we will get your prize to you!!! And a big thanks to our very generous sponsor!!!
Woo Hoo we are giving away another prize today. It's a Scrapping Angels kit donated by the lovely Anna @ scrapping angels! There will be a draw tomorrow so leave us a comment to be eligible for the prize!!!
It's Tuesday again and today we are bringing you the last in a series of LO classes!!
Mixing patterned papers :)
We are so lucky to be joined once again by the very talented ~Angie~ who has created these fab LOs as examples of mixing different patterned paper line on a LO.
Crocs Rock I've been trying to scrap this photo since I got my first pair or Crocs earlier this year. When I started to think about how I could use a mixture of papers from different manufacturers, I went straight to my box of scraps. This seemed to be a great place to search through for papers that might go together. Having found a few different patterns I cut the pieces into strips,inked the edges, and lay them across the cardstock base. I like the way the different papers create a bold interesting background. Usually this would overwhelm a photo, but as the subject is only a pair of shoes I feel it doesn't matter in this case. The finished layout is quite layered....I used some Hambly overlay, and Heidi Swapp Ghost letters so all the time the papers can be seen through from underneath.
You Spin Me Right Round On this layout I didn't want to overdo the paper,I wanted quite a clean look, so I found 3 papers with a similar feel to them. Two of them I simply placed in opposite corners, and the third I used for the arrow and to mat one of the photos.
Sweetie Pie This time I wanted to create a vivid fun layout, using lots of bright colours and patterns. I started with the Doodlebug flowery paper, then found other papers that co-ordinated with it. I wanted to use quite large pieces which I layered under the photo. A spot of doodling around the edges of it all adds another fun element. I love this layout- so bold, and it was great fun to put together. I don't think I'll ever be afraid of mixing papers again! And Di has used different patterned papers to create this fab LO!! I hope this will inspire you to get out your scraps and start mixing papers!!
haPPy creATing!!
Caz
xx

Monday, October 29, 2007

Just old fashioned scrapping...

A BIG "Hi" to you all from Di (in Sunny Johannesburg, South Africa this weekend).
This morning we have a prize winner and its Heather from Scotland!!! Please contact us at acreativeworld@hotmail.co.uk provide us with your address and your prize will be on it's way to you!!!

Do I have to remind you that I am an 'old fashioned' scrapper? I used to make scrap books using post cards, menus and loads of stuff cut out from magazines. Well, guess what, I still like to do that!!!!

Recently I spent a week in a beautiful place called Hermanus watching the whales. I was there with my niece Joanne and her boyfriend Richard. Jo asked me to help her make a little momento of the holiday for Richard (who lives in Wales). Now Jo has never scrapped before so we reverted to the old fashioned style!

This is what we made for Richard:

And this is what we started with:
For the pages: cut 2 pieces of cardstock into 6 by 6inch squares.

For the back cover: cut a 6 by 6 inch square of cardboard.

Fot the front cover: cut a 6 by 6 inch square of corrugated cardboard and peeled away some of the brown paper to reveal the corrugated bit.

We used brown ink for the cardboard and green pages and black ink for the red pages. This is what we collected to fill the album:

We collected brochures, menus, bills, and of course photographs!! We cut WORDS from old magazines.

The Front cover

The back cover:

Some of the pages:

We had lots of fun and it did not take long! I have decided that I am going to make an old fashioned scrapbook of IDEAS, using stuff torn from magazines! I think it will be great fun, simple and therapeutic .
Oh and just a reminder that you still have time to scrap your boobs!

And another reminder to keep those donations pouring in. You have been so generous and every single pound helps.

Thanks for visiting us at IACW with love from Di XXX

Sunday, October 28, 2007

Children's Christmas crafts

One of the most Special ways to remember Christmas is to make something each year with a child. :0) Here are a few ideas from Joy and Angela. Sweet Stockings
Materials: Stockings cut from paper (one normal, and one negative image), more patterned paper, adhesive, hole punch, ribbon, lace
Step 1: Cut the Stockings with a die-cutting machine or with scissors, using a pattern. Note - the second side should be the reverse image so that when you lay them together, the edges line up. (The brightly painted table is my messy play table!)
Step 2: Punch Holes along the edges of the stocking (both sides touching).
Step 3: Tie a bit of the end of Ribbon at one end of the stocking. A child can lace it through the holes.

Step 4: Add a patterned paper top to the stocking, and then glue on a lace fringe.

The stockings can be used as ornaments or to hold small items (like candy canes). Or, you can make a larger version to hang up. :0)

Joy xxxx

Hand Print Christmas Trees This year is the first year I have been able to make something for Christmas with DS, and we had lots of fun getting paint and glue everywhere! He is 18 months, so just shows you can do crafts with Children from an early age! We covered his hands in various shades of green paint and made 24 hand prints on some light weight cardstock. While we waited for these to dry, DS painted himself and a sheet of card in gold and painted some red in a triangle to make a base for the Chrismas tree. When everything was dry, I cut around the handprints and then we stuck them down with glue in the shape of a christmas tree. DS then painted "Baubles" on the tree by dabbing a paint dauber over the paper. I cut a star shape out of the gold painted card and we stuck this on top. Finally we added a piece of multicoloured wool as tinsel. 
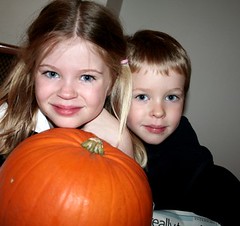
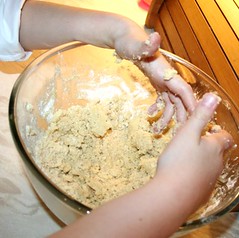
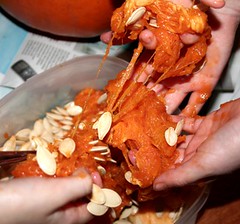
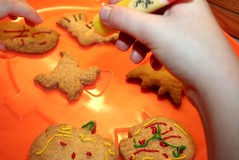
We had great fun making this and getting messy! ~angela~

We really hope that you enjoyed the creations we made with our children. We would love to see what your children come up with.

**~~**~~**~~**~~**

The winner of the kit supplied by Kirsty Wiseman is Rach. Please email us at acreativeworld@hotmail.co.uk with your address. Thank you so much to Kirsty for putting this kit together with her own fair hands.

Today we are offering a fabulous handmade bracelet created by our very own Trish. Everyone who has made a donation to our Just giving prize up until the end of today will go in the lucky dipper.