I love buttons, all sorts, mostly I seem to collect them (well, they do look so pretty in glass jars on my shelf!) but sometimes I actually use them too! The ones I use the most are actually the ones I have made myself, that way you can get a perfect match to your layout, and it's very easy and cheap to do.
I have included a couple of examples here to help inspire you, I really hope you have a go because it is a great way to use up scraps and a nice little crafty thing to make up on one of those evenings when you don't have much time to spare but still want to get creative.
 In this layout I made buttons to perfectly co-ordinate with the patterned paper using clear page pebbles. I bought a few packets of these when I started scrapping years ago but never used them, then I realised they could be used to make fake epoxy buttons! Just stick your page pebble directly on to your patterned paper, burnish the back of the paper with a rub-on stick to make sure it is stuck down properly and then carefully cut out the pebble.

 To mark the holes it is easiest to draw round your shape on a piece of scrap paper and cut that out, then fold that template into quarters to give you some guidelines. If you then punch circles out of the template you can check if you like their position and go ahead and mark them onto the back of your button.
 You can punch the holes with a cropadile or a normal eyelet punch, it's much easier than you think!
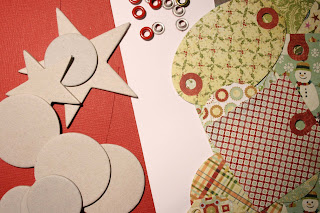
 I made this pile of buttons in less than half an hour, they are now all ready for me to start scrapping! I bought a pack of Basic Grey papers ready to scrap last years Christmas photos, and it came with a sheet of tags which knew I wouldn't use, so I cut up the tags and covered some Bazzill chips with them to make co-ordinating buttons. You could just as easily cut your own shapes out of cardboard, or use one of the larger die-cut machines like a Big Shot.
To finish them off I sanded the edges which went well with the vintage papers, but inking them also looks really effective. You can also set eyelets into the button holes for a really clean look.
I made this pile of buttons in less than half an hour, they are now all ready for me to start scrapping! I bought a pack of Basic Grey papers ready to scrap last years Christmas photos, and it came with a sheet of tags which knew I wouldn't use, so I cut up the tags and covered some Bazzill chips with them to make co-ordinating buttons. You could just as easily cut your own shapes out of cardboard, or use one of the larger die-cut machines like a Big Shot.
To finish them off I sanded the edges which went well with the vintage papers, but inking them also looks really effective. You can also set eyelets into the button holes for a really clean look.
In this layout I used Bazzill chips again but painted them with acrylic to give a perfect match to the cardstock I used and then drew on some simple detail using a white marker pen.

 I really hope you have a go at this, a great way to add some fun to your layouts and use up those scraps :)
Charlotte x


 The candy canes are for hanging in my kitchen, which is having a Christmas foodie theme. They are very easy and quick to make, all you need is two pipe cleaners, I used red and white, twist them together and bend the top round to form the hook.

 Caz has made these gorgeous lavender filled tartan hearts for her tree; she used pinking shears to help stop the edges from fraying. These will smell and look gorgeous on her beautifully decorated and lit tree.
 I hope you have enjoyed today’s post; don’t forget to email us with any pictures of the items we have featured here. Today we are also doing a prize drawer to win a fab kit from Kirsty Wiseman just leave us a comment on today’s post and we will draw a winner on Sunday. We have exceeded the target for donations that we had set ourselves and are really grateful to all of you that have donated on our just giving page, Thank you, and a HUGE thank you too to all you lovely brave ladies that have scrapped your boobs and sent us the pictures.
Trish xxx
I hope you have enjoyed today’s post; don’t forget to email us with any pictures of the items we have featured here. Today we are also doing a prize drawer to win a fab kit from Kirsty Wiseman just leave us a comment on today’s post and we will draw a winner on Sunday. We have exceeded the target for donations that we had set ourselves and are really grateful to all of you that have donated on our just giving page, Thank you, and a HUGE thank you too to all you lovely brave ladies that have scrapped your boobs and sent us the pictures.
Trish xxx


 Place this on a
 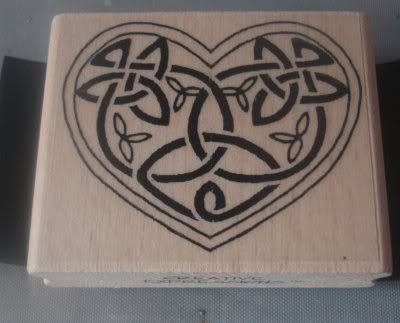 When you lift up your stamp you should see an
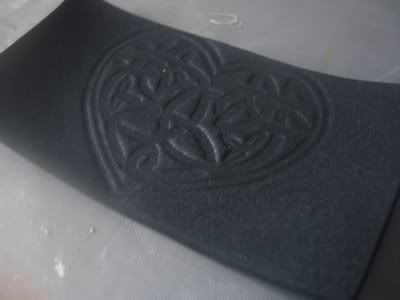 Now to make this stand out, I painted it, using a
 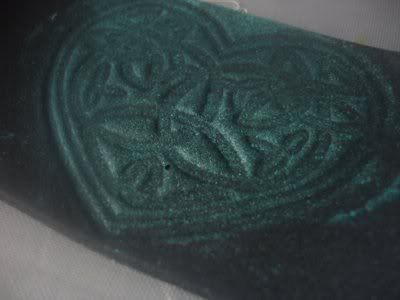 I then
 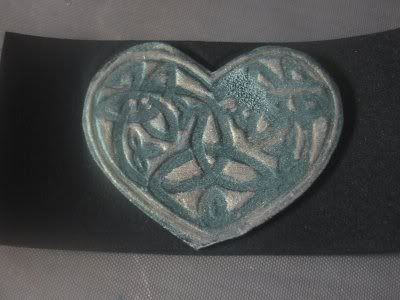 I then cut around the image, but you can leave it as it is.
Here is another example:
I then cut around the image, but you can leave it as it is.
Here is another example:
 Fun foam can be sewn on or attached using your regular choice of adhesive. There are many different things you can do with this, making an impression with random textured things that are around your house.
Have fun
Fun foam can be sewn on or attached using your regular choice of adhesive. There are many different things you can do with this, making an impression with random textured things that are around your house.
Have fun 
 Hi , my name is Anna Bowkis, I live in a small village in Cambridgeshire with my hubby and two girls. I have a very fond love for sketches and a year ago I came up with the concept of Pencil Lines, the sketch challenge blog. Every week we have a new sketch for our readers and a guest designer. Our readers gallery is very popular, and one lucky reader each month recives a RAK form one of our sponsers. This month is our first anniversary, and we have lots of sketches, prizes and RAK’s to give away.
I have made this sketch especially for “It’s a creative world” readers and hope you enjoy creating.
Thanks for having me as a guest this week, its been such fun!
Hugs
Anna x
Hi , my name is Anna Bowkis, I live in a small village in Cambridgeshire with my hubby and two girls. I have a very fond love for sketches and a year ago I came up with the concept of Pencil Lines, the sketch challenge blog. Every week we have a new sketch for our readers and a guest designer. Our readers gallery is very popular, and one lucky reader each month recives a RAK form one of our sponsers. This month is our first anniversary, and we have lots of sketches, prizes and RAK’s to give away.
I have made this sketch especially for “It’s a creative world” readers and hope you enjoy creating.
Thanks for having me as a guest this week, its been such fun!
Hugs
Anna x


 I drilled the sea glass (barely under water) to make a neat hold in the glass. I then stamped it with a Green Pepper Press stamp. I put in in the melting pot, and I sprinkled UTEE on it to make the image pop. I then outlined it with a gold Krylon pen.

 I took a pictures of my son stamping and colouring. I then cut the artwork to fit in the slides, and I added his photograph of him making the picture. I put a wire loop in between the pictures. I added gold tape around the edges (a Ranger technique and also demonstrated to me at Magpie Crafts).
 I stamped onto shrink plastic, puched a hole at the top, and coloured the bear and stars. (The plastic is actually clear, and the bear is coloured white, but it is difficult to tell in the image.) I shrunk it (with a heat gun) and added a white ribbon. This is a great project to do with kids.

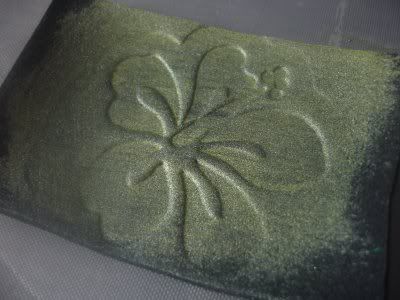
 Once this was all melted, I poured it out onto a non-stick craft sheet and set the cookie cutter into the UTEE .The cookie cutter should be inked with some versamark or other release agent to remove it from the utee when it has set.
 Leave the utee to cool. Be very Careful! This stuff really burns! I left mine for around 10 minutes and then very carefully pressed out the shape. If you are very careful you can have the positive and negative shapes, the negative would make a nice frame.
 Now it is ready to be stamped on using Stazon ink, I then doodled around the stamped images using Sakura Souffle pens to make them stand out more.