Do you love using different fonts on your layouts?
There are so many to choose from aren’t they.
Today I’m going to list a few sites that I think are the best for fonts and also give you some tips on organising them.
Firstly here are the sites I like to use for my free fonts.
1001 Free Fonts
Dafont
Font River
SharkShock
Urban Fonts
Disney Fonts
ScrapnFonts (chargeable)
Create your own font
Free Scrapbook Fonts
If you are a Quickutz/Sizzix Fan then you can get fonts that match all your fabulous die cut alphabets, how cool!
Find them here
Quickutz
Sizzix Fonts
Now some of you may be a wiz with fonts but other people simply don’t know how to install them which is fair enough. I’ll try to explain very briefly how to do it.
The easiest fonts to download are TTF (true type fonts). These don’t need any unzipping or anything. You simply download the file, locate it and place it in your fonts folder.
Your fonts folder ‘should’ be in your control panel but may be different depending on your operating system. Click start and control panel. You should find a folder labelled Fonts in here but if not then go to Appearance and Themes and it should be in there. Some files are downloaded as Zip files which means you will need to extract the files from it with something likeWinzip and once extracted you would just do the same and put the file in your Fonts folder.
I hope that makes sense?
I personally have XFonter and love it but you do have to pay for it although a free trial is available.
XFonter
X-Fonter is an advanced font manager, especially created for web-designers, graphic artists and font fanatics.
In a simple user interface you can quickly find the font that you need. Even with thousands of fonts on your computer, with X-Fonter they're just a few clicks away.
- Supports TrueType, OpenType, Postscript Type 1, Raster, Vector Fonts
- Organize your fonts in custom Collections
- Preview and Use Fonts without installation
- Install or Uninstall any TrueType Fonts
- Search for fonts on any drive/directory
- Font Filtering by Font Family, Codepages and Font Style
- Adjustable Colors, Styles and Sizes
- Character map (ASCII and Unicode)
- Image editor with nice effects (JPG, GIF and clipboard output)
- Very simple and intuitive interface
- No extra DLL's required
- Uninstall option
- Compare fonts in Dual pane
- Print font overview
- Font Manager
Font Thing
- Browse installed and uninstalled fonts
- Browse fonts in subfolders as a single combined list
- View sample text and individual characters in your choice of colours
- Change sample text "on the fly" or easily switch between your own standard text samples
- View detailed font information
- Print font samples
- Associate notes with fonts
- Install or uninstall any number of fonts at once
- Load (and unload) any number of fonts for temporary use
- Copy or delete any number of font files at once
- Rename font files to avoid file name conflicts
- Filter fonts according to their type
- Group fonts into collections for easier management
- Use multiple font windows simultaneously for easy font comparison and management.
Amp Font Viewer
This program is an easy to use but powerful font manager, which allows getting a quick overview of both installed and non installed fonts. It can install and uninstall fonts, and organize them in categories. Some of its features are:
- Supports TrueType and OpenType fonts (Windows 2000/XP required for PostScript OpenType fonts)
- Supports Type1 fonts (Windows 2000/XP required)
- Installation of fonts from a folder (one by one or from a list).
- Installation of fonts temporally (until the program is closed).
- Deletion of installed fonts.
- List of all installed fonts with several display options.
- List of the fonts from a folder with several display options.
- Several options for organizing fonts in categories and managing them.
- It can print a list of all or some of the installed fonts with an example of each font.
- Scratchpad area for testing the look of any font (installed or from a folder).
- Dual English/Spanish version.
Well I hope this has given you a little insight into the wonderful world of Fonts!!
Cath x

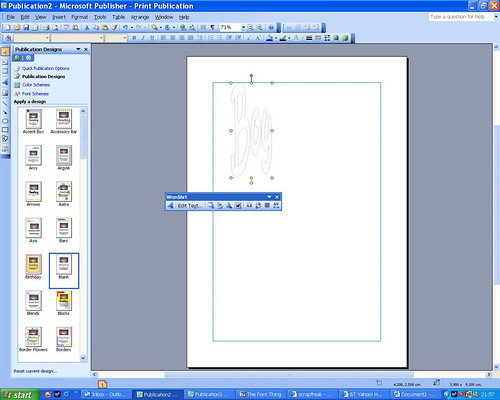
 Open publisher and choose blank page > word art (left hand side). Select highlighted box on top upper left, giving you an outline font.
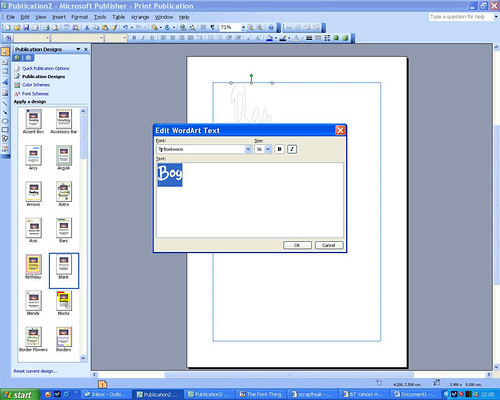
 Type your title word. Select edit text and choose font >choose bold.
 Click text box to select and stretch word to the size you require.
 In edit text choose format text > grey > at 1 point.
The reason you want grey is to avoid deep black outlines. You are going to cut these letters out and the grey outline is for guidance only. Cut just inside the lines, so your transparency letter is clear of any markings. (This, you may like to add back in later with a slick writer style pen for a freestyle look).
In edit text choose format text > grey > at 1 point.
The reason you want grey is to avoid deep black outlines. You are going to cut these letters out and the grey outline is for guidance only. Cut just inside the lines, so your transparency letter is clear of any markings. (This, you may like to add back in later with a slick writer style pen for a freestyle look).
 Print title word out at desired size. Cut out and you're ready to play!
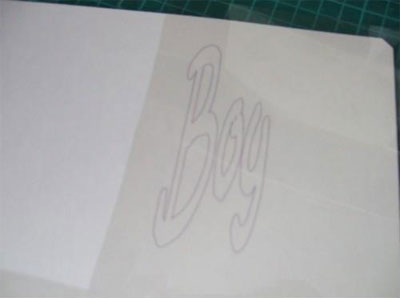 Do remember to set your printer to ‘mirror image’ or reverse printing and to print onto the rough side of the acetate. This way, you can flip it over once printed, and the good smooth side will be the side that shows on your project.
So - You now have your blank ‘ghost letters’, which you can grunge up, jazz up, colour up, doodle on – however your mood takes you!
Do remember to set your printer to ‘mirror image’ or reverse printing and to print onto the rough side of the acetate. This way, you can flip it over once printed, and the good smooth side will be the side that shows on your project.
So - You now have your blank ‘ghost letters’, which you can grunge up, jazz up, colour up, doodle on – however your mood takes you!
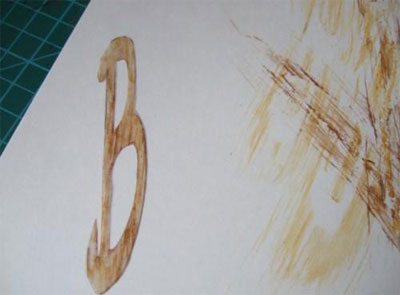 1. The letter has been cut out and dry brushed with acrylic paints.
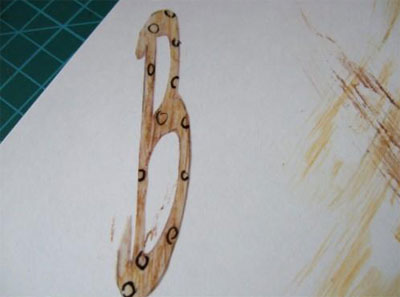 2. I’ve added some scribbled circles to the letter here.
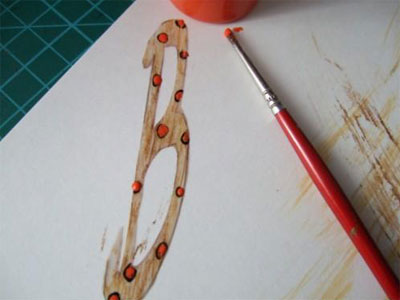 3. Next I blobbed paint onto the circles.
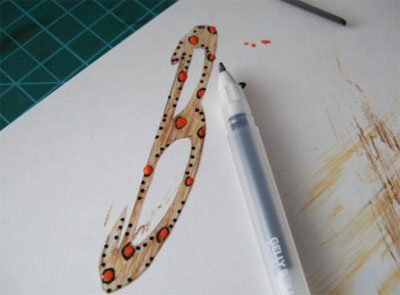 4. Then added some doodling detail – and I’m done! Took minutes!
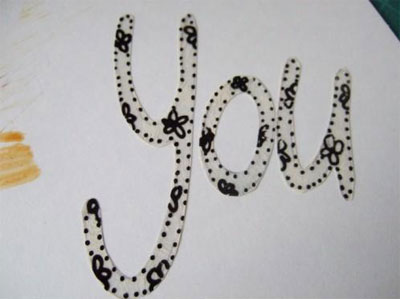 A different style. Flowers and dots!
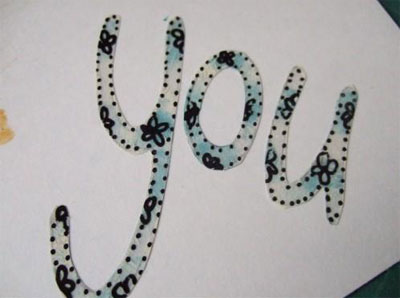 And again, but with a bit of chalk ink smudged on the back – who says you can’t do freestyle lettering? Lol!
Read on for some tips on having fun with these versatile letters – but why stop at lettering? Print out butterflies, birds, flowers, stars… anything you like! Paint them, doodle on them, add glitter, bling, alcohol inks…. your imagination is your only limit!
A few tips for enjoying these versatile letters/shapes!
The transparency will accept acrylic paint very well. Paint on the back (rough side) for more durability. Or paint on the front and scratch some paint off for a grungy look. You can completely cover the letters with paint or dry brush as I have here.
Use a slick writer to doodle outlines, circles, flowers, dots or stars… or whatever you want to go on them. Write on them, add glitter, buttons and beads…
Alter the colour with alcohols inks, or stamp over them using stazeon inks for a permanent finish. Why not paint first – then stamp over? You really can do so much with them – and can customise them easily to fit your project.
I’m sure you can think of lots more ways to use this technique.
Just remember to have fun whatever you do!
Happy Scrappin!
Jakey xx
A HUGE thanks to Jakey from the Creative World team - there's a little something on it's way to you in the post!! ;)
And again, but with a bit of chalk ink smudged on the back – who says you can’t do freestyle lettering? Lol!
Read on for some tips on having fun with these versatile letters – but why stop at lettering? Print out butterflies, birds, flowers, stars… anything you like! Paint them, doodle on them, add glitter, bling, alcohol inks…. your imagination is your only limit!
A few tips for enjoying these versatile letters/shapes!
The transparency will accept acrylic paint very well. Paint on the back (rough side) for more durability. Or paint on the front and scratch some paint off for a grungy look. You can completely cover the letters with paint or dry brush as I have here.
Use a slick writer to doodle outlines, circles, flowers, dots or stars… or whatever you want to go on them. Write on them, add glitter, buttons and beads…
Alter the colour with alcohols inks, or stamp over them using stazeon inks for a permanent finish. Why not paint first – then stamp over? You really can do so much with them – and can customise them easily to fit your project.
I’m sure you can think of lots more ways to use this technique.
Just remember to have fun whatever you do!
Happy Scrappin!
Jakey xx
A HUGE thanks to Jakey from the Creative World team - there's a little something on it's way to you in the post!! ;)