
We at It's a Creative World love to experiment and dabble in all forms of Art and Creating.
And today we are so excited to be launching a project that we know you'll love!
On the 5th January 2008 we will be off on a year long journey.
A journey that will take us from A to Z.
We want you all to come with us as we learn about new medias, and discover ourselves.
So the plan is!
On the 5th January and every two weeks following, we will post a prompt starting with the letter A.
That prompt can be interpreted in any way you like.
The Creative World Girls have chosen their themes and here is the list of ones we have come up with...
1. A to Z Book of Me - e.g. A for Artistic
2. A to Z Crafters Journal - by products and techniques e.g. A for acetate
3. A-Z of Everyday, a sort of catalogue of ones day if you like
4. A-Z Crafters Journal - by theme e.g. A for Angel
5. A-Z Altered Art Journal
6. A-Z of Us
7. A-Z of Life e.g. A-Anniversary, B-Birthday C-Cooking H-Housework S-Shopping
8. A-Z of Baby e.g. C-Crying, T-Teething, L-Laughing, P-Playing
9. A- Z Occasions e.g. A-Autumn, B-Birthdays, C-Children
10 A-Z Book of You, could be for your children or husband
But of course you can choose a different theme for each letter too!
Lets talk about format!!
Art Journals.
Buy a sketch book from any good art supply shop, decorate the front and back covers, and art journal each letter on a new page. You will also have lots of pages to journal. And if this is going to be a BoM, life or everyday journal you will need the space!
Or in a Scrapbook Albums.
You can choose 6x6, 8x8, 8.5x11 or 12x12. You will need to decide how much information
How about an ATC for each letter.
ATC are cute and if you haven't got time to do large format this will be perfect.
Or tags, that can be bound together at the end.
Tag books are fun and easy to make, start by cutting out a tag for each letter so on prompt day you can just sit down and create!
However you choose to create your pages or whatever theme you choose, we want you to come and play, so email us at acreativeworld@hotmail.co.uk with A-Z as your subject to sign up :)
There will be spot prizes through out the year for the girls taking part and sharing their work. Pages emailed to us will be uploaded to a flickr album :)
And the best bit....it's FREE!!!
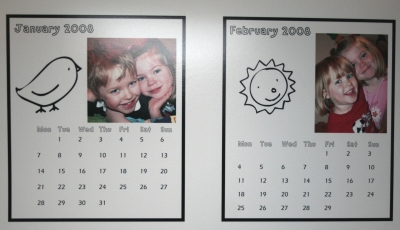
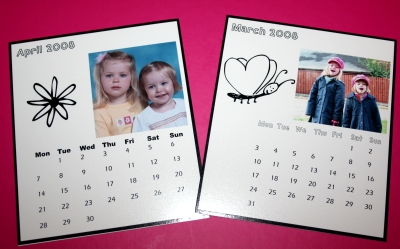
Here are a few examples of the books the Creative World Girls have made
Charlotte
I am going to make an "Everyday" journal which I hope will turn out to be a mini catalogue of our life right now, warts and all! When I look at photos of me when I was much younger I always find myself looking in the background - what was our furniture like, what our telly looked like etc. I find the everyday bits and bobs fascinating so I would like to have a record of 2008 life so we can look back with interest and a giggle in 30 years time.
 To make the journal I cut out 4 sheets of card (the plain stiffener bits I keep from packs of patterned paper or cereal box card is a similar weight) and covered them with patterned paper (front and back of the front cover and front and back of the back cover). Once the card was covered I punched holes using my bind-it-all carefully ensuring that they lined up with each other when the front and backs of each cover were joined together. I then sandwiched two lengths of ribbon between the two sets of covers so that when the journal is completed and bound I can tie it shut if it's quite bulky.
 I am going to use a double page for each letter and I think they will be mainly photos and journalling, then I will pick similar embellishments (in terms of type, colour etc.) for each page to carry some flow through the journal.

 Di
Di

Joy
 I used stamps from Tin Can Moon and Stampers Anonymous to stamp images on tissue paper. I added in painted and burned felt hearts and stars, little mirros, beads, pocket watches, and stained glass tiles.

 I added more burned felt tags, a pocket watch of seed beads, and small bead embellishments to the journal rings.
I repeated the same process with the back, following similar techniques for consistency.
I added more burned felt tags, a pocket watch of seed beads, and small bead embellishments to the journal rings.
I repeated the same process with the back, following similar techniques for consistency.


 And now all that is left, is for you to decide if you want to do a themed album and what format you will work on.
Making your art journal cover is about doing something that shows a little bit of your soul. Find your favourite stamps, beads, paints, little pieces from other projects, embellishments.... anything goes!

 I used stamps from Tin Can Moon and Stampers Anonymous to stamp images on tissue paper. I added in painted and burned felt hearts and stars, little mirros, beads, pocket watches, and stained glass tiles.

I created paper casts of Claudine Hellmuth's stamps to make the hand, and I added pearl mica and gold leafing pens to the cover.
 I added more burned felt tags, a pocket watch of seed beads, and small bead embellishments to the journal rings.
I repeated the same process with the back, following similar techniques for consistency.
I added more burned felt tags, a pocket watch of seed beads, and small bead embellishments to the journal rings.
I repeated the same process with the back, following similar techniques for consistency.


 And now all that is left, is for you to decide if you want to do a themed album and what format you will work on.
There are 8 weeks till the first prompt, so plenty time to sign up and get ready :)
Come on you know you want to play!!
haPPy creATing!!
The Creative World Girls
xx
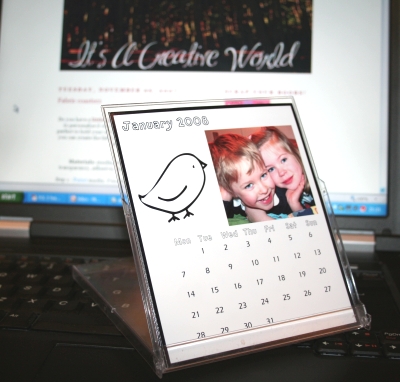
 There are 2 pics of the final product, one using a scanner and one using a camera, at the start and end of this post. This shows the variation as embossed images can be tricky to photograph due to light reflecting.)
Step 1: Grab some paper and
There are 2 pics of the final product, one using a scanner and one using a camera, at the start and end of this post. This shows the variation as embossed images can be tricky to photograph due to light reflecting.)
Step 1: Grab some paper and 
 Step 3: Use a baby wipe to blend and remove colours. Add additional colours as you feel they fit.

 Creating art journal pages lets you have free expression - something to create without a set of precise instructions and something based on how you feel at that moment....... a good time to try out new and crazy things, too.

 and the letters (Making Memories) white white brilliance ink.
  I blasted it with the heat gun to set it.


 Step 2 - Stamp an image using


 Step 8: Enjoy! :)


