Thursday, September 27, 2007

Baby Card

Hello, I've made a baby boy card today to share with you but it could easily be changed to a baby girl card by using different coloured papers.
The instructions are in three stages - the round topper, 'baby' letters and the card assembly.
The round topper:
Step 1:
Stamp a suitable baby image with black stazon onto white card.
Step 2:
Use a circle punch to punch the stamped image, turn the punch over so you can see where to cut the circle.
Step 3:
Use watercolour pencils to colour the image.

Step 4:

Ink around the edges of your stamped image with charcoal chalk ink and layer onto a slightly larger blue circle using foam pads to give dimension and chalk around the edges again.

Step 5:

Punch a scalloped circle from white card using a large punch, doodle and ink the edges

Step 6:

Glue the white circle onto a slightly larger blue circle and ink around the edges.

Step 7:

Mat the stamped image onto the scalloped circle using foam pads.

The 'baby' letters

Step 1:

Cut letters from blue cardstock using a die cutting machine, electronic cutting machine or with scissors.

Step 2:

Doodle around the edges with a fine black pen

Step 3:

Use a cuttlebug embossing folder to emboss the letters

Assembling the card:

Step 1:

Cover a square card blank with patterned paper and ink around the edges with charcoal chalk ink.

Step 2:

Glue a strip of white ric rac across your card.

Step 3:

Use foam pads to attach your topper over the strip of ric rac.

Step 4:

Glue the 'baby' letters under the topper.

I specifically chose patterned paper that looked like it had lots of strips of ribbon running across it and added the ric rac to give extra detail to the card.

(Patterned paper by Flair Designs, ric rac from Fenwicks, punches by Dovecraft and EK Success, rubber stamp by Studio G, font for 'baby' letters stovetop, Cuttlebug embossing folder)

You could easily make this into a girl card by substituting the blue paper for pink paper and if you aren't sure of the sex of the new baby try something that isn't the typical blue or pink.

Have fun and don't forget to check back on Saturday for details of our fabulous prize draw. Andrea xx

Wednesday, September 26, 2007

Clay Creations

This is a little project that is great to get your mojo going - and even something you can do with your kids.
Materials: Air dry clay
and (vary as you like) - angelina fibers, paints, stamps, other molds/icetrays/items to make impressions, heat gun, embossing powder, stylus/pin (for carving), glossy accents
For the beads, shape as desired. I used an embossing stylus to carve some designs into the clay.

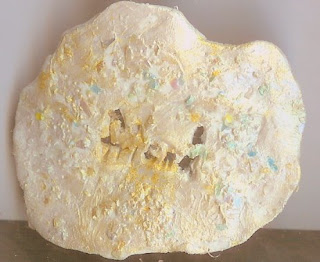
I used a silicone ice tray to shape the heart, and I carved, "sweet," into the clay with the embossing stylus. For "friend," I used a Heidi Swapp stam to stamp directly into the clay, and I added Stewart Gill Byzantia chips (pressing them into the clay). For the star, I used another silicone ice cube tray to shape the clay, and I carved, "dream," into the clay.

For the shell, I pressed the clay onto a seashell, and gently lifted it off. For the moon stamp (tin can press), I stamped directly into the clay. I freeformed the small heart and wrapped it with heated angelina fibers (zapping it again with the heat gun).

Next, I added gold interference paint to the small heart.

At the same time, I stamped Stampers Anonymous wings into the clay, embossed them, and added angelina fibers. I zapped them with the heat gun immediately.

At this stage, I left all pieces to dry for several hours. I returned to work on them (not fully dry, but dry enough to add paint and other materials).

I painted the beads with lumiere paints and colour washes, finishing them with highlights from a krylon pen.

I added told interference paint and more gilding chips to the friend embellishment.

I used gold interference paint on the shell.

I painted the star with Stewart Gill alchemy paints. I added glossy accents to make it shine.

I used red lumiere paints and iridescent medium on the heart.

I painted a plastic box, added ribbons and beads, and then framed it.

Finally, for the moon, I made a shadow box from a 7gypsies tin. I spray painted the tin black and gold. I added the moon and angelina fibers (heated with a heat gun.) Next, I added previously made UTEE stars, and I glued on beads and coloured, shrunken plastic.

I hope this gives you some ideas for clay embellishments and projects.

xxx
Joy

Tuesday, September 25, 2007

Fabulous cards

We are so excited to have another guest visit us at It's a creative world. Today we have some fabulous cards created by the uber-talented Claire Hamer aka Ginger.
Ginger is regularly published and has made these cards to share with you. If you look carefully you can see who the lucky recipient of one of them is.
Ginger said *I sometimes struggle to use my "best" stash. You know the stuff that you really love but I challenged myself to see how many letters I could use out of these gorgeous spotty pink Bazzil letters*.
Well, the girlies here at It's a creative world are certainly pleased that you cracked open your best stash to share with us.
Thank you so much for taking the time to come and play Ginger.

Monday, September 24, 2007

Back to Basics!!!

Hi all from Di in Cape Town. Every now and again when I look at my stash, I feel completely overwhelmed by all the stuff and cannot even begin to scrap. No inspiration!!! It’s then that I need to do something really SIMPLE and get BACK to BASICS. Simple for me is often ‘small’, so I revert to my ‘old scrapbooking’ techniques and just use cardstock, patterned paper, some photographs and MY MEMORIES. So today an “easy peasy”, quick to make little mini album designed to let you complete something really quickly, and hopefully get the creative juices going again.
When I was on holiday in England in August I took lots of pics of Caz's garden and the allottments. I was so moved by the bounty of beautiful vegetables!!! That's the theme for my "easy peasy" mini album: SIMPLE ABUNDANCE
Supplies 1 sheet BasicGrey Fruitcake Berry branch / Maraschino cherry 1 sheet Bazzill cardstock Black 1 sheet Bazzill cardstock Pickle A few brads Preparation Print 8 themed photographs wallet size . Cut the ‘Fruitcake into 9 4 by 4 inch squares (for the 9 pages of the album) Cut the black cardstock to matt the photographs . (I cut mine 3 1/4 X 2 1/2 inches) Cut 1 piece of pickle card stock 4 by 5 ½ inches ( for the back cover) Score each of the pages ¼ inch from the left most edge. (so the album opens easily) Ink all edges (I used red) Score the pickle cardstock at 4 1/4 " and 4 1/2 " from the left most edge and ink all edges Ink photographs and matt onto the black cardstock Now attach photographs to the pages of the mini album.
Cut 7 circles from the pickle cardstock. Then we will use the ‘holes as well! Attach the circles to the back of the “fruitcake”, and journal in the circles. Now put the album together with brads or ribbon – I used 3 brads. Finally attach the back cover using double sided tape or your preferred adhesive! And we are DONE!!! This project takes about 1 hour and at the end you have something quite simple but it’s FINISHED. Woo Hoo, watch this space for a special prize next weekend for anyone who likes something "girly". Guess that eliminates NONE of us LOL. More news during the week!!! Thanks for visiting and love from Di XXX Today we are extending a HUGE Creative World welcome to a new member of our Design Team!! Welcome to the fabulous Angela :) Angela has been a guest designer here at IACW, with her fabulous fabric baby wall hanging and I for one can't wait to see what exciting projects she has up her sleeve for us all. Angela will join Joy in WOWing you all with her altered style and awesome imagination :)

Sunday, September 23, 2007

And now for something Different...

And it's a big IACW welcome to our guest designer "Lemon" who has something up to date and very special for you today. Over to you darling!!!
Hi and good morning from "Lemon". Today we will make an acrylic album.
Supplies: Acetate and transparencies for printing on Papers BG Periphery zinfandel BG Periphery Chablis BG Periphery petit BG Periphery die cut sheet BG Periphery contact sheet from the front of the pack BG Periphery sugar alphabet stickers Rub-ons BG paisley border BG japans style 7 Gypsies baby girl 7 Gypsies elements architecture
Tools and odds and ends! Herma, dst, or any dry adhesive Scallop scissors Circle punch Sand paper Diamante ring Lace Stick on gems – clear and aqua blue Stamps and ink Flourish stamps Corner stamp Circle stamp Circle journal stamps Sentiment stamp Stazon ink – black Chalk ink – charcoal Cleaning supplies Cotton wool buds Herma label off or undo Alcohol blending solution

(You will need the cleaning supplies if you get any dirty smudges off you fingers from the ink or from the adhesive that you use. )

Preparation: First cut your pages from the acetate. Mine are 9.5cm long x 21cm wide. To make a replica of this book, you will need to cut 8 pages. Then punch the holes at one side. I used a square punch and a wire ring but you could you use book rings or ribbon. I printed all my photos out at 2.5 x 3.5 inches and then just trimmed them a little. We are going to make this album backwards to help with the placement of the items….don’t stick anything down until you are sure of the placement of them.

Page 8: Cut a piece of the petit green paper 7.5 x 15.5 cm and take the die cut from the sheet and ink the edges of both. Centre the green paper and adhere it to the page and then centre the die cut…..don’t put any glue near the top as you will need to slightly lift it when using the rub on. Using one of the paisley rubons rub them onto the page…I had to cut mine in the middle to keep the line straight and get the swirls in both top corners. Adhere the photo and add the blue gems.

Page 7:
Cut a piece of the zinfandel blue paper 9 x 12 cm and cut a piece contact sheet…I used cork. Now cut a scallop border along the edge of the cork paper. Ink all edges of both the papers. Adhere the cork paper to the blue paper and adhere your photo towards the right hand side. Place your alphabet stickers on the left and adhere the clear gems to the scallops. Adhere the piece of lace under the blue paper on the right, and then adhere to the acetate. Page 6:
We are going to use the natural frames on the Chablis cream paper to frame our photos so be careful where you cut! On this page we are going to use the frame in the top left corner of the sheet. You need to measure 9cm across the top and cut down 12cm. Check the example (pg 6) to see what I mean. Ink the paper. Attach your photo to the paper - at this point it will stick out over the top. Take one of the die cuts and ink it. Cut a piece off the contact sheet, I used olive. Ink the edges and stamp a sentiment onto it. Adhere the cream paper to the acetate on the left hand side 0.5cm from the holes. Now adhere the sentiment and the swirl and add a blue gem to the swirl. Trim the top of the photo off. Page 5:
This is where you are going to print on your transparencies. I used an overlay from http://www.polkadotpotatoe.com/ for this page and I used a digital brush from http://www.designerdigitals.com/ for page 4. There are plenty of freebies out there, or you could use pre-printed ones, or even a flourish stamp and stazon ink, the choice is yours. I just printed the overlay and cut it to size. Page done. Page 4:
Cut a piece of the Chablis cream paper. You need to cut a piece 8 x 17.5 cm. Cut it so from the right hand side along the bottom line of the box so that you leave intact the word “Paris”……and ink it. See the picture. Cut from the contact sheet the vineyard paper and scallop one edge. I used a circle stamp for the journaling and punched it out. Print your digital image onto transparency and adhere it to the underside of the vineyard paper as above. Adhere these to the cream paper and then your photo. I then added the journaling block, and rubbed on two of the flowers from the Japanese style rub ons. Then adhere clear gems to the scallops. Page 3:
Using the flower die cut sand all the edges and keep the little bits from the inside for later. Adhere it to the bottom right hand corner of the acetate and add the blue gems. Cut from the contact sheet a block of three papers. I used the block that included cabernet, petit and zinfandel, ink the edges. Adhere to the acetate butting up to the flower. Adhere the photo. Ink the edges of one of the swirls from the die cuts and adhere slightly over the photo. Ink the edges of the left over flower bits and adhere to the edge of the paper and place a blue gem in the middle. Page 2:
This is the tricky bit. I used a mat that has a grid on it so it makes the next bit quite easy. If you don’t have one, then mark a cross on a blank piece of paper and use that. Place the acetate over page 3 and line the edges up. Then taking note of where the centre of the flower is, remove page 3 from underneath keeping the acetate in place. Then using a circle stamp or a circle rubon, centre it and stamp using stazon. Cut a piece of petit 11 x7 cm and ink the edges and stamp using the corner stamp. Ink the edges of the blue diecut. Adhere the petit, the die cut and then the photo placing them as above. Add 3 clear gems to the corner of petit. Page 1:
Cut the Chablis 8 x 17.5cm… note you should have the word “Paris” in the top right corner, and ink it. From the contact sheet cut the verdot and ink the edges. Ink the edges of the green die cut and a blue swirl. Punch out a circle and ink the edges then apply a rubon from the architecture sheet. Adhere both of these overlapping the frame on the paper. Place the acetate over page 2 and adhere the verdot so that you can’t see the circle below it, then add the swirl to the top of it, only part of it will show. Adhere the photo inside the natural frame. Add the blue gems to the circles of the frame and a clear gem to the bird’s eye. Album cover:
Using a flourish stamp and stazon ink, stamp to the left hand side near the holes. Ink the edges of the two die cuts. Add a small crown rub on to the small die cut and the diamante circle or a circle of clear gems. Place page 1 underneath and line up the large one so it is over the photo and so that the small one covers the rub on on the circle, then adhere them to the acetate. Add your title to the large die cut using the alphabet stickers and then add three blue gems to the flourish. And the album’s now complete! Hope you enjoy making it!
Thanks for visiting and love from "Lemon" XXX

Saturday, September 22, 2007

Scrummy Yummy Easy Chocolate Cake

This is my easy-peasy recipe for scrumptious chocolate cake. I am not known for being a Nigella Lawson so, if I can make this anyone can!!
Ingredients:
Cake:
8oz self raising flour
8oz caster sugar
8oz butter
4 eggs
2 heaped dessert spoons of cocoa powder
Dribble of milk
Filling:
4 oz Icing Sugar
2oz Butter
1 dessert spoon of cocoa
Drop of milk if needed
Big bar of cadburys chocolate
Baking Parchment or greaseproof paper
2 x 7" sandwich tins
Directions:
Mix the sugar and the butter in a bowl until light and fluffy.
Mix the cocoa into the flour and alternate a spoonful of flour mixture and some beaten egg into the sugar and butter mixture until you've added it all.
If the mixture does not drop easily from a spoon add a dribble of milk.
Grease and line the base of the sandwich cake tins with a circle of greaseproof paper or baking parchment and divide the mixture between the two tins (leave enough mixture in the bottom of the bowl for licking!!)
Place in a preheated oven at 160 degrees in a fan oven (or equivalent) for approximately 25 minutes. When pressed with a finger the cakes should spring back when they are cooked.
Cool in their tins and then turn out on to a cooling rack.
To make the butter cream filling, cream the butter until soft and fluffy and gradually mix in the icing sugar and a dessert spoon of cocoa. Add a drop of milk if the mixture is too thick.
Remove the paper from the cakes and place one upside down on a plate. Spread the butter cream over the cake and place the second cake on top.
Over a pan of simmering water melt the chocolate in a bowl (making sure you've left a couple of squares for the cook!) and then spread over the top of the cake and decorate with icing sugar flowers, halved walnuts or smarties - or all three if you are extra hungry!
Try to wait for the chocolate to set before munching!!