


We are so very excited to welcome the fabulously talented Lousette Ashton back to It's a creative world. I shall hand you over to Lousette and let her weave her magic.
A long time ago I bought several packs of small, very cheap IKEA photo frames, you know the ones that are 3 for £1 or something silly like that. I had grandiose ideas for them, but nothing ever came of it and they sat in a box under my bed for years (literally).
Then one day I saw a beautiful photo printed onto a canvas in a restaurant, and decided to have a go at making my own mini photo canvas using cotton printable fabric from Crafty Computer papers. These little faux canvasses are cute as gifts, and also great for photos that are maybe not good enough for normal printing as the texture of the cotton disguises grain or other flaws.

You will need: Small wooden picture frame Plain white cardstock Spray mount or Photo mount Printable cotton sheet Double sided tape Tacky, PVA or other wet glue Scissors and craft knife

Step 2 Measure the outside dimensions of the frame. Crop a photo to these exact dimensions and print out onto cotton paper. I find it sometimes help to adhere the cotton to a sheet of ordinary printer paper using removable adhesive. Although the cotton has a backing sheet attached to it, it is still quite thin and my printer couldn’t feed the sheet properly on its own.
Step 3 Use double sided tape to cover the front of the frame with plain white cardstock. Trim the cardstock to size. (I always use a bigger piece of card and then trim afterwards using my craft knife instead of cutting the cardstock to size first).
Step 4 & 5 Spray the cardstock with photo mount, remove the backing sheet from the cotton and drape over the frame. The photo mount gives you the chance to reposition the image until it is perfectly placed. Press down gently to make sure the cotton adheres to the cardstock.
Step 6 Cover the sides of the frame with double sided tape and fold the cotton over. Make sure it is nice and taut. Fold each side over onto the back of the frame, mark with a pencil and trim off the excess cotton.
 Step 7 & 8
Use double sided tape to finally glue the remaining cotton onto the back of the frame, making sure the corners are tucked neatly on the sides. Glue the excess fabric of the corners down onto the back with tacky glue. Hold for a few seconds until the fabric stays in place.
Decorate the front with embellishments or rub-ons if you wish, or simply leave as is.
 Thank you so much Lousette and what a fantastic gift for the children to give relatives at Christmas.
If, like us, you've been inspired by Lousette please let us know. We love to see all your creations. And just a reminder: We will be off line on Friday the 30th November for our move over to typepad!! Please be sure to pop back on Saturday the 1st December for the link to our new home.


 If you feel inspired to get crafty for Christmas, leave us a comment with a link to your work so we can all come and take a peek!!
Love from Andrea xx
Today we also say a big haPPy birTHday to our very own Di!! from all the creAtive girls :) xx
All you need is a big pile of double knitting wool. Yes bigger than this. And get yourself a 4.0 mm crochet hook.
 Then skip 2 chain and 3 DC into the next chain and repeat 6 times.
Now make the SECOND corner skip 2 chain and 3DC 2 CH and 3 DC into the next chain.
Then skip 2 chain and 3 DC into the next chain and repeat 6 times.
Now make the THIRD corner skip 2 chain and 3DC 2 CH and 3 DC into the next chain.
Then skip 2 chain and 3 DC into the next chain and repeat 6 times.
Now make the FOURTH corner skip 2 chain and 3DC 2 CH and 3 DC into the next chain.Then skip 2 chain and 3 DC into the next chain and repeat 6 times.
You should now be back t the FIRST corner!!!
Slip stitch into the top of the 1st DC and across the next 2 DCs.
Then skip 2 chain and 3 DC into the next chain and repeat 6 times.
Now make the SECOND corner skip 2 chain and 3DC 2 CH and 3 DC into the next chain.
Then skip 2 chain and 3 DC into the next chain and repeat 6 times.
Now make the THIRD corner skip 2 chain and 3DC 2 CH and 3 DC into the next chain.
Then skip 2 chain and 3 DC into the next chain and repeat 6 times.
Now make the FOURTH corner skip 2 chain and 3DC 2 CH and 3 DC into the next chain.Then skip 2 chain and 3 DC into the next chain and repeat 6 times.
You should now be back t the FIRST corner!!!
Slip stitch into the top of the 1st DC and across the next 2 DCs.
 Then just carry on going round and round keeping your corners in the right place and changing colours whenever you feel like it!!!
 I do hope you can learn to crochet!!!! If you need any help I will be in England from the 11th of December 2007 and would so like to meet you and help you get started!!!
And just a reminder:
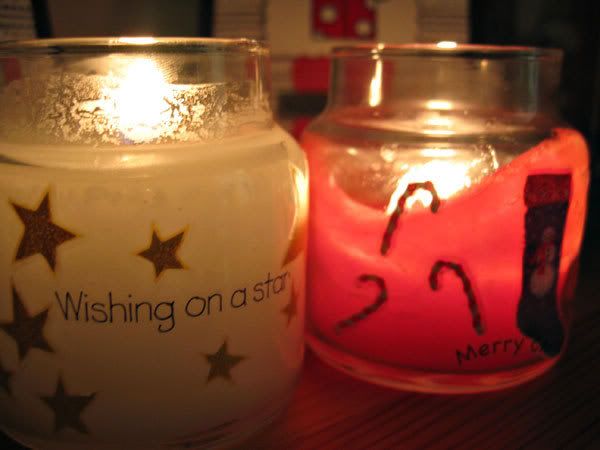 "Very, very simple for these, I just removed the label from my Yankee candle jars, cleaned off the glue and applied some festive rubons around the jar. As the candle burns down, it shines its light through the rubons."
Here are the ones that I made:
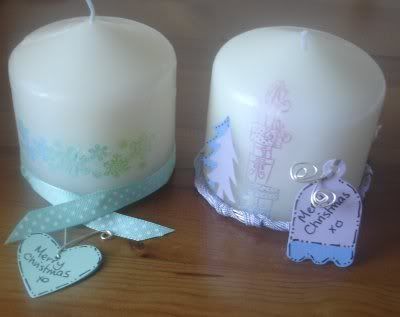 I embedded the stamped image into the candle – this was surprisingly easy to do. I stamped a Christmas themed image onto a piece of white tissue paper using Brilliance Inks, and heated this just to make it set, then trimmed around the image quite closely. Once I had done this I used a glue stick to adhere the tissue to the candle, just to hold it in place, and then heated the candle using a heat gun. As the candle is heated, the wax melts and covers over the image, incasing it in the wax. You need to be careful doing this as it can get very hot. Then while the candle was hot I rolled it on a non-stick craft sheet to try to smooth out any bumps in the candle caused by the wax dripping. It is awkward to do this and it never looks as smooth as it did when you started out!
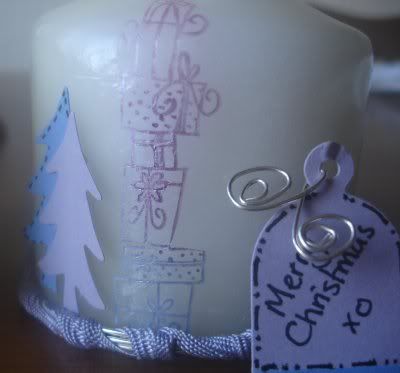 Once the candle had cooled, I wrapped wire around one of the candles, and then wrapped ribbon around this wire. I then punched out 2 tags in contrasting colours and doodled on it. On the other candles I punched out some Christmas trees and adhered them on (these will obviously need to be removed if you are lighting the candles!) and decorated another tag.
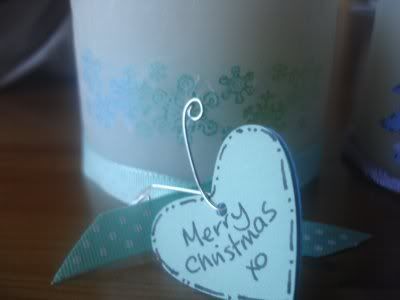
 And a couple of close ups.


 Then I used some left over 'tartan' fat quarters and calico for a more traditional look!
 Thanks for visiting
  As a family, we eat LOADS of soup at this time of year, both for warmth AND comfort! I find it quick, easy and convenient to throw some veggies into a pot with some stock, turn up the heat, and leave the veg to soften before blitzing the lot with my hand blender. I never follow a recipe for these soups, but they're always delicious, and really filling - even better when accompanied by some home made bread, fresh and still warm. Here are three quick and very easy recipes for soups using only seasonal veg - these all came from this week's veg box.
Jo's leek & potato soup
a dash of olive oil
an onion
four or five good sized leeks - nothing too short or skinny!
two fist-sized potatoes
vegetable stock
Put a heavy-bottomed pan over a medium heat and add a dash of olive oil (or other oil or butter, as you prefer). Finely chop an onion and add it to the oil in the pan, and let the onions sweat until soft. Peel and dice the potatoes, and add to the onions in the pan. Thoroughly clean and roughly chop the leeks - cleaning the leeks is really important as there will often be the odd bit of mud lurking somewhere beneath the layers. Add the leeks to the onion and potato in the pan, and let this mixture sweat for about five minutes to soften the veg a little, before adding about half a pint of stock. I usually make up a pint of stock, and add more as necessary, sometimes after the whole lot has been blended. Turn the heat down under the pan, cover and leave to simmer until all of the vegetables have softened enough to blitz! Once softened, the whole lot can be blended either in a liquidizer, or using a hand blender, which is what I normally do. Taste, and add pepper and salt to season, and serve with a swirl of cream and some fresh bread!
The same method can be followed for both the carrot & parsnip and the broccoli & sweet potato soups. With the carrot & parsnip I use equal quantities of each veg, and I use one medium-sized sweet potato for each head of broccoli. All of these soups can be very thick and gloopy, depending on the amount of stock you use. I like them like this, but if you find that they're too thick, add some more stock, or some skimmed milk.
My children love these soups, and they're a great way of getting veggies into reluctant veg eaters. Enjoy!
 (Papers from Dovecraft and Crafts By Carolyn, reindeer by Crafts for Christmas)
Step 2
Trim patterned paper to fit your card blank, edge with black chalk ink and adhere to card.
Trim white cardstock to fit your reindeer, edge with black chalk ink and mat onto black gingham paper. Trim this and edge again using the black chalk ink.
Attach your reindeer to the card mat using strong glue (I used my trusty sticks everything glossy accents)
Use foam pads to raise your reindeer from the card to give added dimension.
Tie a co-ordinating ribbon around your card and thread two silver bells on before securing the knot
 I hope you and your family enjoy making and receiving this little jingling reindeer - We always like to see what you have been making so please leave a link in the comments box
Love Andrea xx

You really don't have to spend a fortune on goodies and could just fill the tin with a sweetie for each day.
I tend to keep our box as a lucky dipper but you could number the pressies. You don't even have to put 24 goodies in and could make it last for as many days as you wanted. You really can make it however you fancy and according to your budget.
I quite fancy doing one for the run up to a special birthday. You could give a gift and a clue about the real pressie that is in the tin for the big day. Mind you, if I received it I'd be very tempted to have a sneeky peek.
I hope that you like my advent box and I'd love to know about any Christmas traditions in your home. You never know the advent gift box could become a new tradition for your family.
Ooh, before I go I must say *WOW* love those glitter mists Angela. I think I shall have to partake of some of those.
Ooh, ooh, don't forget that we are still collecting for breast cancer awareness and will have a few more giveaways for those that donate.
Toodle pip
 I have 3 colours at the moment, but after all this playing I have ordered some more :)
Glimmer Mists are made by Tattered Angels, and they come in a spray bottle, a bit like glittery Colour washes. They are primarily for use on paper, but they can be used with caution on some other mediums.
They can be very messy, so if you are particular about your work area, it is probably best to cover it!
You need to shake the Glimmer Mists really well before each use, as the Shimmery part settles on the base of the bottle, and when you spray, hold it about 10 inches away from your project to get a good over all cover.
First I sprayed the three colours randomly onto a piece of white cardstock, while this was still wet, I placed a piece of clingfilm on top and moved this around to create a texture and left the piece to dry. When it was dry the texture looked like this:
 These would make great backgrounds for cards.
Next I tried a resist technique by embossing a stamped image with clear embossing powder and them spraying the mists over this. The colours pooled on top of the embossed area and I wiped this off carefully using a baby wipe. I love the effect this gave.
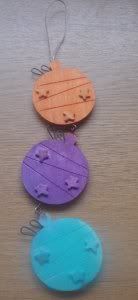
 I then sprayed a variety of surfaces to see how well it works on them. First I used a wooden Christmas Decoration, it worked well on this and you can see the shimmer well on it.
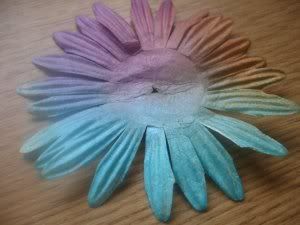
 I also used a paper bloom, which had been a very pale green and spritzed the colours. This is a beautiful effect and ties in wonderfuly with some of the new Blonde Moments Scrapbook papers!
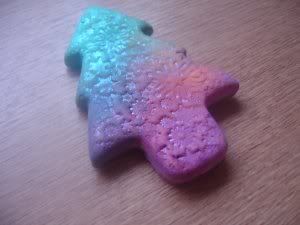
 I then tried Model Magic, which is a modelling clay that is like spongy foam when it dries (this enables you to sew through it). I cut a christmas tree out with a cookie cutter and then stamped a snowflake image into it. When it was dry I then sprayed it with the Colour Mists.
 Finally, I used the colour mists to try the “Faux Watercolour” Technique that Tim Holtz uses in his first DVD. Spray the mists onto your stamp, and then place the stamp onto a piece of card. Here are 3 images I tried.
 A word of warning though, this does stain the wood on wooden stamps, so if you are concerned about this, you could just use unmounted ones. Now I have 4 beautifully coloured wooden blocks! :)
I hope that this will encourage you to do some more experimenting !
~angela~
.JPG) It was fun working out all the different colour combinations and how many of each I would need.
It was fun working out all the different colour combinations and how many of each I would need.
.JPG)
.jpg)
.jpg) 448 squares make two very pretty blankets!!
448 squares make two very pretty blankets!!
 For me, this was a HUGE achievement because I am a great starter of projects but not a great finisher.
 | provided by www.hit-counter-download.com |