Friday, September 21, 2007

Simple Canvases

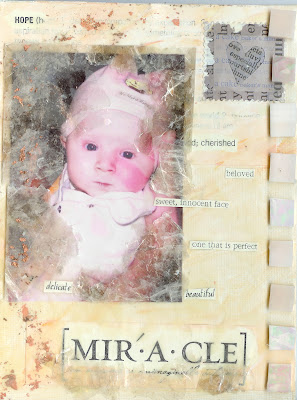
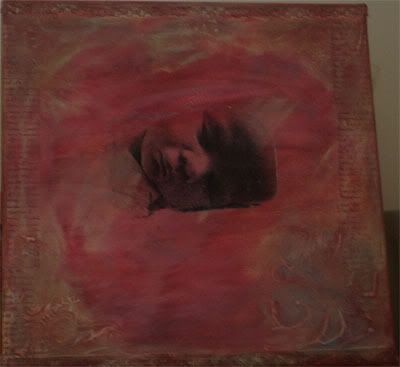
This is a canvas you can make in a few hours (including drying time).
Materials - photograph, mica tiles, gold leaf (or other sparkly material), text (stickers, printed text, etc), tiles (or other embellishments), paint, glue
Step 1: Paint the canvas background with gesso and other acrylic paints. Leave to dry.
Step 2: Add your photograph (mounted, or edge with paint or a Krylon pen - example below).
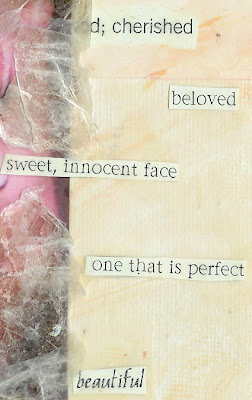
Step 3: Add your background text. I used baby-oriented stickers. You can see that I also painted over them, so some of the words are clear, and others are semi-transparent. Then I added some gold leaf on top.
Step 4: Add your mosaic tiles or other embellishments to the edge of the canvas.
Step 5: Add accents as you wish. (I added a heart at the top, and I edged it with white paint.)
Step 6: Peel mica tiles into corners to make a frame for your photograph. Layer them gently around the photograph.
Enjoy. :0)
xxxx
Joy

Thursday, September 20, 2007

Quick and Easy Card

Hello Everybody! Joanne here! This is my first post and I'm a bit nervous! From now on I'll be sharing the Thursday card slot with Andrea and today it's my turn. Here's the card I've got for you, super quick and easy and even better - it only takes one sheet of patterned paper!

The secret to one sheet of paper is to use the wonderful Scenic Route Scrap Strips. The one I have used for this card is Sumner Scrap Strip 1. So, here goes:

Here are all the elements you need. One sheet of cardstock to make your card (or you could use a blank ready made card), one sheet of Scrap Strips, a few American Crafts felt flowers, small chipboard frame or similar and two buttons.
Step 1
Cut your cardstock to 15cm x 22 cm and fold in half for a landscape card. Cut two strips of the patterned paper 5 1/2cm x 15cm and cut a smaller strip to go across the middle. Ink the edge of the smaller, middle strip for a little definition. Arrange on your card like so:

Step 2

Arrange flowers and stitch together with a button. Stamp a sentiment onto a scrap of the cream cardstock and attach to chipboad frame as shown. Ink the edges for a little definition:

Step 3

Arrange the flowers and sentiment on the card and stick down. There you have it! Super quick and easy card!

I hope you liked this card and have fun making it.

See you soon! Joanne x

Wednesday, September 19, 2007

Good morning!!
It's a Caz here with a scrapping class and a side to scrapping that I find very important :)
I started scrapping in 2003 and not having had all my childhood photos scrapped, it is something that I am doing along with photos of my parents as children and the photos that I take now.
Often there is no story behind an old photograph, it's random.
BUT every now and again you will look at a photograph and memories will flood your mind, and this can often relate to the 'other things' in the photo!
In the photograph on the LO below, I am sitting on the grass, holding my poor dog around the neck with a patio suite in the background. Now I have no idea why this photo was taken, what date it was taken and who it was taken by, but what I do know is........
Memories flood my mind when I look at this photograph. That outside table and chair unit was so uncomfortable, the chairs where a silly angle so when you sat, it was like sitting downhill - backwards! And if you did not have a seat cover on, you got a waffle pattern on your butt, lol!!Tiger, who I am holding around the neck, came to live with us from grandma and grandpa. He was old and not so playful but I loved him and evidently he didn't mind having a cuddle!
At the time we lived in a house with yellow garage doors, a large garden, and a swimming pool. I remember it so clearly even though we left there over 25 years ago.
The second LO is slightly different. I actually went out and took this photo to go with a memory, that I have no photographs for.
Way back in 1986 when we lived in Kloof dad decided to keep chickens! He built them a really cool coop with a sheltered bit at the back for them to sleep and lay eggs in. Occasionally we would let them out to walk about the garden and surprisingly the cats, of which we had 6, never bothered with thm. Maybe one day we can have some again!!
When I found out one of our neighbours had chickens it triggered the memory and I knew it was something I had to document :)
Sometimes when a photograph seems to have no place in any of your albums, take a look at the surroundings and stop focusing on the subject. You may just find some memories tucked away!!
Thanks as always for visiting It's a Creative World, and a big TOOT TOOT from me to the rest of the design team for the continued inspiration :) haPPy creATing :) Caz xx

Tuesday, September 18, 2007

Slow cooking with Maria

Hi, it's Maria here once again. Thank you so much to Di for yesterdays post I certainly learnt something new there.
As the nights are starting to draw in and there is a nip in the air I start to look forward to some comfort food. But, I don't always have the time or the inclination to be slaving over a hot stove and on days like that my slow cooker comes to the rescue. I love my slow cooker and it has paid for itself many times over so I thought that I would share a few of my favourite recipes with you.
Today I have two variations of my girlie wirlies favourite, cowboy stew. They love this and even asked for it during the summer. Mind you there were days when you needed to eat some stodge to warm you up.
Ingredients
Beef stew meat
Potatoes cut into cubes - I prefer to leave the skin on
Half a chopped onion
1 can of BBQ baked beans
1 can of baked beans
A big ole splosh of Worcestershire sauce
Method
Bung it all in the slow cooker, stir and leave for about four hours or until beef is tender. My cooker doesn't have a high or low setting so you will need to check your own cooker for timings.
I also have a skint student or store cupboard standby version for you.
Ingredients
Tinned stewing steak Tinned new potatoes Half a chopped onion 1 can of BBQ baked beans 1 can of baked beans
A big ole splosh of Worcestershire sauce Method Bung it all in the slow cooker, stir and leave for about two hours.
These recipes easily transfer to a crock pot in the normal oven and can be stretched a bit further with some crusty bread.
I have a fair few slow cooker recipes so let me know if you fancy anymore.
Toodle pip

Monday, September 17, 2007

So you think you CANNOT draw ???

Hi again from Di.
Now you have heard me say before that I am NOT an artist, but, thanks to some great techniques I CAN actually draw and paint when I choose. And how do I choose? I do a brain switch. So if you too think you CANNOT draw here are a few techniques that just may change your mind.
I discovered this book in 1983 (I know because my name and the year are on the inside cover!!!)

It changed my ability to draw dramatically!

If you know anything about the brain you will know that it consists of 2 hemispheres, the right and the left hand sides of the brain. The left side is the ‘logical’ side and the right side is the 'artistic' side. Many of us work using the ‘logical side’. Now I am not going to rewrite the book, just point out a few of the techniques that the book describes.

Technique number 1: Vases and Faces

Whenever I sit down to draw I do this exercise. It makes me physically feel and experience the switch from the left to the right side of the brain. First draw a profile of a face, as simple as possible. Now lift your pencil and create a mirror copy of the profile. This time you should experience the switch to the right side of the brain. You will find yourself drawing lines and angles that hopefully match the original profile. and you will not be drawing eyes and a nose and a mouth. Did you experience the shift?

Now try again this time drawing a really grotesque witch like profile. Same again copy the profile.

Technique number 2: Upside Down drawing
I love this exercise because I manage to copy something that in my wildest dreams I would NEVER have been able to reproduce. OK I was tasked to copy this!!

As you can see the picture in the book is actually upside down so you copy it using the same technique as we used with the vase, we copy the lines and the angles. When the picture is upside down you are less aware of noses and ears and ties and chairs, all you see are lines and angles!!!

And this is how mine turned out!!! OK he is a bit BIGGER in my drawing but there is no disputing the likeness.

Just recently I rediscovered the book and decided to try to paint with oils!!! Cezanne is one of the artists I admire so I decided to copy one of his pieces. I use a book to do the copy.
OK this is still a work in progress, but for someone who CANNOT paint or draw, I am quite pleased with it so far! There are lots of techniques in the book and it is well presented and easy to read. I hope that this helps you discover and extends your hidden and creative talents! Oh and one last thing I have taken up Caz's challenge and have started a new blanket. Am determined to be finished by Christmas!!! Thanks for visiting and love from Di XXX

Sunday, September 16, 2007

Bags of fun

Hi, it's Maria here with a little project that I worked on with my girlie wirlies.
But, first of all I must say a huge thank you to the lovely Karen for her fab post yesterday. I shall be sending Graham up into the loft to dig out all my tired old picture frames.

The girlie wirlies had plain cotton bags in their Brownies kit and rather fancied zhuching them up a tad. They knew what they wanted but as it involved some sewing they enlisted my help.

They selected some felt from the fabric box and cut the shapes with the Sizzix. Then they raided the button jars and set about planning the design.

I printed their photos onto some canvas that I found at the bottom of the fabric box. I stuck it to a piece of plain paper with repositionable Herma before putting it through the printer.

I whiled away the wait for them at drama class sewing the buttons around their pictures. I then sewed the picture to the bag and attached the heart. A few flowers along the top were attached by sewing a button in the centre.

Now, I'm no fantastic sewer but it only took an hour or so to put one together. And, most of that was spent trying to thread the needle!!!

Now, I just need to help them with their sewing and they can sew those Brownie badges on for themselves.

You can get plain bags from Baker Ross rather cheaply if you fancy giving it a whirl. I quite fancy doing a couple of larger ones to use when I go shopping. Please remember to share any of your creations with us as we always love to see what everyone else does. Ok, we're just nosey really.

Toodle pip

Saturday, September 15, 2007

Fabulous photo frames

Hi, I’m Karen and I was thrilled to be asked to be a Guest Designer for today. Thank you ladies for inviting me. I’m going to show how to transform an ordinary, run of the mill photo frame into an object of beauty.

As you can see, my photo frame was looking dull and the photos were about 3 years out of date too, so the whole thing was desperately in need of a makeover. I’ve covered this one with cardstock weight patterned paper, which works well on flat surfaces, but if you have a moulded frame, you could paint instead (I’d recommend you use gesso as a primer first).
Supplies for the frame shown here:
Mod Podge Sandpaper K&Co Amy Butler Belle patterned papers Fancy Pants chipboard flowers Li’l Davis Designs chipboard photo corners Li’l Davis glitter chipboard alphabet Maya Road chipboard heart Heidi Swapp fuzzy rub ons, pink Li’l Davis glitter glaze, clear Lime green, bright pink & pale blue acrylic paint Pale blue ric rac
Firstly, choose your patterned papers – the ones I’ve used are K&Co Amy Butler Belle but the beauty is that you can use absolutely anything and match it to your home décor. Measure the width and height of the frame, and cut strips of patterned paper to size. Note: as my frame is quite wide, I had to join two strips together for the top and bottom strips but I matched the pattern carefully and it’s barely noticeable. Alternatively, you could use lots of paper scraps and cover your frame in a patchwork effect.
To mitre the corners , simply place the patterned paper strip in position on top of the frame and make a small mark to show where you need to cut at an angle. The photo below is to illustrate this; I’ve used a thick black line so it can be seen more clearly but in practice I just make a very small mark with a pencil by the inner corner of the frame.
Sand the frame lightly to key the surface, and use Mod Podge to stick the papers in place. Allow to dry and sand the edges of the paper to give a distressed/aged feel; apply a thin coat of Mod Podge to seal.
Once dry, decorate the frame as you like. I covered some chipboard flowers with patterned paper, then sanded the edges and tied on some ric rac. I then added some glittery chipboard lettering plus some painted and glittered chipboard embellishments. You can keep it simple or pile on the embellishments; a word of wisdom though (it’s probably obvious but I learned this the hard way when I did my first frame a while back) – if your photo frame is to be used freestanding, make sure that the embellishments don’t overhang the bottom edge or it won’t stand up!
As a finishing touch on my frame, I added some new up to date photographs and used rub on velvet lettering on each photo. I hope you like the project and it inspires you to give some of your old frames a makeover of their own.

Friday, September 14, 2007

Top Tips

Hi all today we are doing craft top tips, I have asked all the CW girls and this is the list we have come up with, If you have any others please leave them in the comments section. Trish xxx Trish - get yourself an A2 (at least) craft mat. Maria - I like to bag bits up so that I can do something at short notice. Kind of a ready made kit for when the girlies are in bed and I get a spare hour. - Bulk buy Herma, as I never know when it is at the end of the roll. - Turn off the computer or I get distracted and nothing gets done. - I gut patterned paper if I'm mounting something big Di - using project folders for work in progress Caz - after each LO/project pack everything away so you're tidy before starting the next one Andrea - When making cards and I want to cover the whole of my card blank I don't cut out the paper first, I use double sided tape all around the edges to stick my paper to the card and then turn it over and trim with a craft knife. This means that I never have wonky cards and edges that are less than perfect

Thursday, September 13, 2007

Teenage Boy Card

I'm a girl - I like making girly cards - flowers are my speciality :) I do tend to struggle when making male cards and especially teenage boy cards. I always seem to stay safe and use large letters to spell out their names or numbers in 'boy' colours to identify their age.
So today I challenged myself to come out of my safety zone - to make a card for a teenager using no ages and names.
I did intend to do step by step photographs but the best laid plans and all that - the camera battery went flat as soon as I took the first photograph.
I used patterned papers from The Shabby Princess and Pink Petticoat, Making Memories chipboard buttons (if you haven't tried these you should really get some as they are lovely), alphabet stamps, black chalk ink and staz-on ink and a black pen. Cut a square of striped paper, rectangle of spotted paper and the large circle was made by drawing around a jar lid and the bottom of a glass. Doodle and ink around all of the edges and glue onto a card blank. Cut a star from patterned paper, tie embroidery thread around the chipboard button and glue in place. Use the alphabet stamps to make letter tiles to spell out Happy Birthday and add a thin strip of black and white doodle striped paper.
Hey Presto - a card for a teenage boy that doesn't have
golf clubs, a 1970s footballer or a sailing boat on it!
Happy Cardmaking, love from Andrea xx

Wednesday, September 12, 2007

Decorated door hangers...

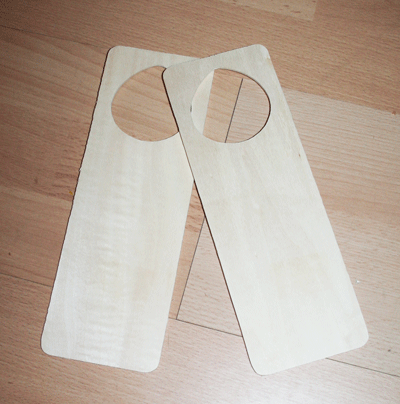
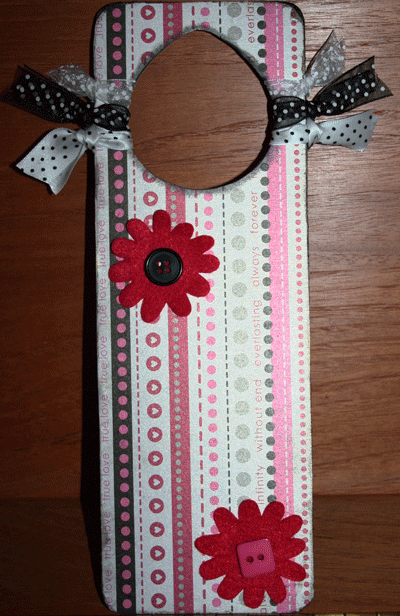
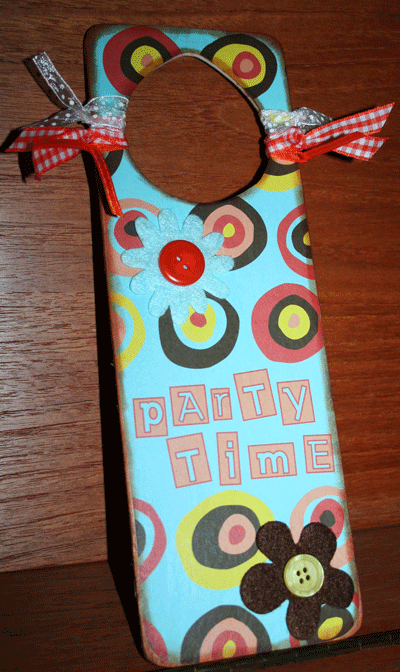
Hello :) It's Jo here again, with some decorated door hangers for you to try out! These make great gifts for children, and can be personalised or themed, whatever takes your fancy. I bought my 'blanks' from Hobbycraft, but I've also found them here, here, and here. This is how the wooden blanks look 'naked': door-hangers-1 In addition to the blanks, I used two sheets of patterned paper, one for each hanger - you don't need anything like as much as a whole sheet of 12x12, and this is an ideal project for using up scraps or offcuts from other projects. I also used ribbon, buttons, felt flowers and ink. Having made my paper selection, I traced around the outside of the blank with a pencil, onto the patterned side of the paper. I then carefully cut just inside the traced line, all the way around, so that the cut paper shape was just a little smaller than the blank. This just ensures that the edges are neat and that there isn't any overhang. It doesn't matter if a little bit of the wood is showing around the edges as these are going to be inked. I used a very slightly watered down PVA glue mix, and applied glue to both the blank and the patterned paper before very carefully sticking the paper to the blank. The glue isn't very forgiving, so it is important to line up the paper before finally sticking it down, and then smoothing it out to get rid of any air bubbles. Having stuck the paper onto the wooden blank, I let it dry for around five minutes, and then brushed over the top of the paper with the PVA solution to seal it. When this has completely dried, you are ready to ink around the edges of the hanger; this gives a nice finish, and will hide any joins between the paper and the wood. If the ink is a little wet, make sure it is completely dry before adding your embellishments. I've used ribbon, flowers and buttons, but in terms of what you put on your door hanger, the sky's the limit! Here's one of my completed hangers: door-hanger-2 For this one, I used Ki Memories paper, American Crafts felt flowers, and Blonde Moments ribbon and buttons. And here's the other one: door-hanger-3 And here I've used Cherry Arte paper, with flowers, ribbon and buttons as before. These are really quick to make, and as well as making great gifts, they are a fun project for kids to do on a rainy afternoon. Happy crafting! xxx

Tuesday, September 11, 2007

Let's get knitting

Hi again from Di. Well as I move into spring and summer guess most of you are moving to Autumn and Winter, so its time to start getting ready for those long winter nights.
And I have another easy peasy project for you this week. All you have to know about kntting is how to: cast on knit plain knit purl and cast off.
Today it's a really cosy blanket for you to curl under whilst watching TV or sleeping! I used only one colour of wool but you could use 9 or 16 different colours depending on how big you want the blanket to be. The blanket is made of knitted squares each measuring 14 inches by 14 inches.
OK what you will need is a pair of 4.5mm knitting needles and 1 and a quarter balls of wool (50 gm) per square. (I made 16 squares). The wool I used is South African made and it's thicker than double knitting so a sort of chunky wool. It is machine washable and 100% acrylic.
So we start by casting on 60 stitches. Row 1 knit Row 2 knit 30 stiches and purl 30 stitches. Repeat these two rows 20 times ( so you have 42 rows)
Row 43 knit Row 44 purl 30 stitches then knit 30 stitches Repeat the last two rows 20 times ( now we have 84 rows) cast off
Finished square:
Ok now knit another 15 squares (depending on how big you want the blanket you can knit more!) Sew them together Crochet round the edge and you are done!
">
I would love to see your blankets so please send us a photograph and we will share it on IACW.
Thanks for visiting and love from Di XXX

Monday, September 10, 2007

Crochet blanket update

Hi from Caz!! :)
4 weeks ago I posted a project that I was embarking on..............to make CROCHET blankets for my nieces for Christmas, and I am very pleased to report to you today that I am 1 down, only 1 to go!!!!!!!!
I am only this far because I had my dear mad mother 'Di' here for two weeks to help me, lol. We worked very hard to get the 224 squares for the first blanket finished and I have spent a few weeks working hard to put it all together.
So today I am going to show you how to finish off the blanket and a give you a few tips from my mistakes.
Once all the squares are finished you need to lay them out on a piece of fabric, an old sheet will do, for mine we bought a piece of calico. (please excuse my not so great photos but I had no intention of trying to move this down to the garden to take pictures!!)
Lay all the squares out, at this point we weren't too fussy about how we lay them out because there isn't a set pattern. But once we had them down we did look to see if there were any 'patches' of the same{ish} colour ways that stood out.
The next task is to get all the sqaures pinned to your fabric, this is a BIG job!
Once they are all pinned down, roll the fabric from the bottom into a big sausage. When you are ready to crochet the squares together, unroll the 'sausage' just enough to be able to see the rows you are working on, and at the end of each joined row, remove the pins from the top row.
When you have finished crocheting all the rows one way, you will find doing the perpendicular ones a little easier as the blanket will be off the fabric.
You can now crochet all around the edge of the blanket!
And there you have it! One completed 'hand made with love' Christmas gift :)
Things I learnt making this blanket!
You need to concentrate just a little, lol, or else you will land up with very funny looking squares {heehee}
Don't start to crochet a row together unless you plan to get to the end in one sitting {crochet stitches unravel themselves if left unattended!}
Give yourself enough time to finish the blanket if making one as a gift {a project this size will become a chore if rushed and a chore is not enjoyable!}
Make sure the wool you use is easily available, we needed far more of the base colour (purple in this blanket) than we originally thought {we bought ours in Wilkinsons and thankfully there was always a good supply on the shelves!}
I still have another blanket to make and so far I have completed 5 squares! Only 219 more to go :)
Don't forget to check back in month for an update!!
haPPy creATing!
Caz
xx

Sunday, September 09, 2007

Canvases and Backgrounds

Hello :) It's Angela here again, thanks again to the IACW girls for inviting me back as a Guest Designer. Today I want to show you a couple of canvases that I have been working on over the last few weeks.
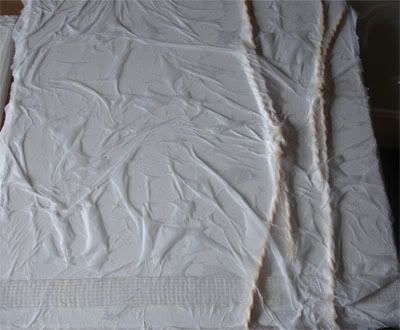
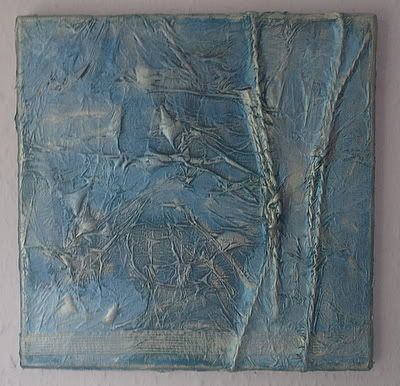
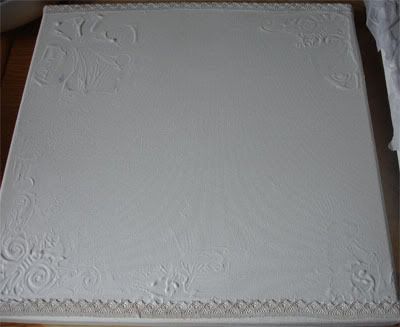
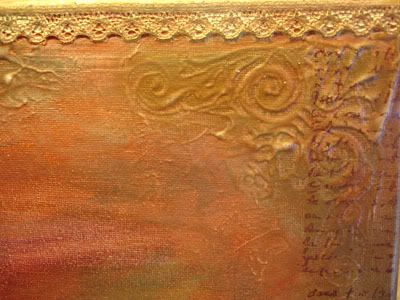
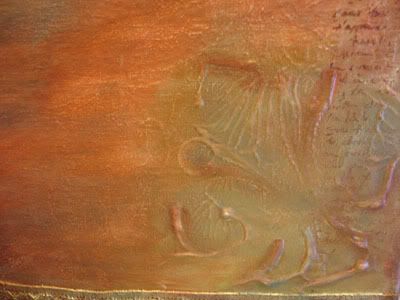
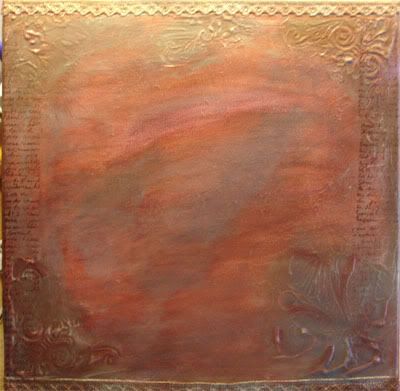
This work is inspired by Maggie Grey. Supplies: 12x12 canvases PVA glue String White tissue paper Ribbon Lace ribbon Gesso Foam stamps Adirondack Paint daubers in various shades Daler Rowney's Interference Mediums Metallic Rub On waxes Brilliance Ink Script Rubber Stamp Golden Gel Medium Photocopied Image For the first canvas, I covered the entire surface with PVA glue I then got two pieces of thick string and tied knots in them. This was then stuck to the canvas again with PVA, and a piece of textured ribbon was adhered along the bottom. This was then covered with a layer of whitetissue paper, then added more PVA glue and then another layer of white tissue. This was left to dry. I then painted over this using Ranger's Paint daubers in denim and stream colours, dabbed randomly and then mixed on the canvas using my fingers, and sponge paint brushes. Once this was dry I highlighted the string and ribbon covered areas with some more stream coloured paint. Once this was dry, I used Daler-Rowney's blue interference medium over the top. Once this was dry, I rubbed over the raised areas with blue metallic rub-on wax to pick out the detail. The finished canvas looks like this: For the second canvas I used gesso (gesso is a substance used to prime surfaces for painting - it is like a thick acrylic paint). I applied the gesso using a palette knife, making sure that the edges were covered in a heavier layer of gesso. I stamped into the edges using foam stamps. It is important that you wash your stamps through thoroughly immediately so that it doesn't dry on your stamp and damage it.
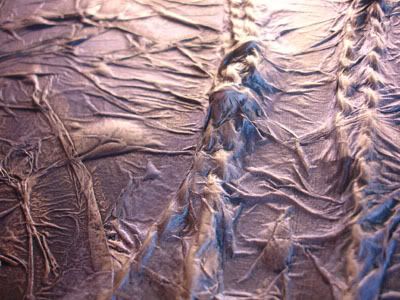
I then cut two thin strips of lace and adhered them to the top and bottom of the canvas by setting them into the gesso, I then covered this with gesso using my fingers, dabbing it into the holes in the lace to make sure that it is properly stuck down. Leave this to dry overnight. Again this was painted with Ranger Paint daubers in Cranberry, butterscotch and a tiny bit of stream. This was worked into the canvas, into the ridges left by the gesso and into the lace. Once this was dry it was highlighted with red and gold interference medium by Daler-Rowney. The stamped areas were then highlighted with metallic rub ons in green, gold and red. This is the main technique for the backgrounds. I was happy with the first as it was, it didn't need anything else added to it. The second canvas had a large area in the middle that needed something, so I did an image transfer using golden gel medium and a photocopy of an image of my son and stamped with a script stamp using brilliance ink onto the side of the canvas. These techniques are really simple and easy to do and give great effects, they would even work on book covers and many other surfaces. ~angela~